
 Save
Save
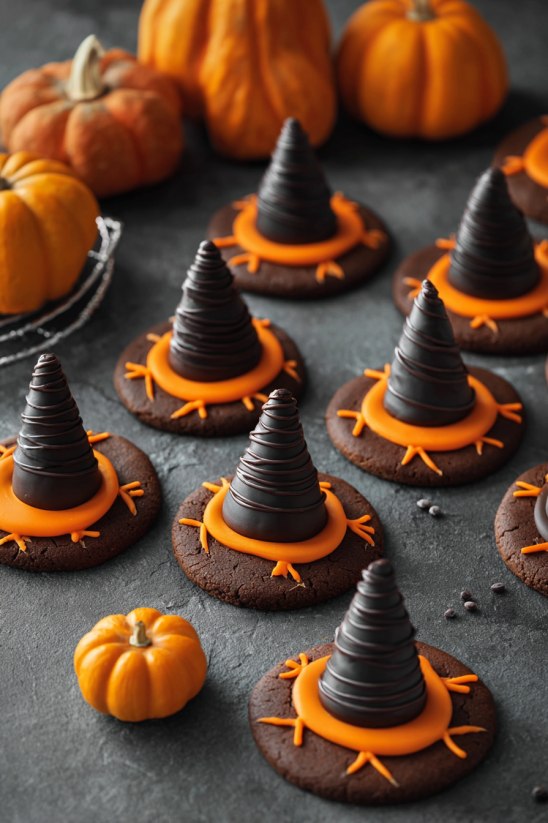
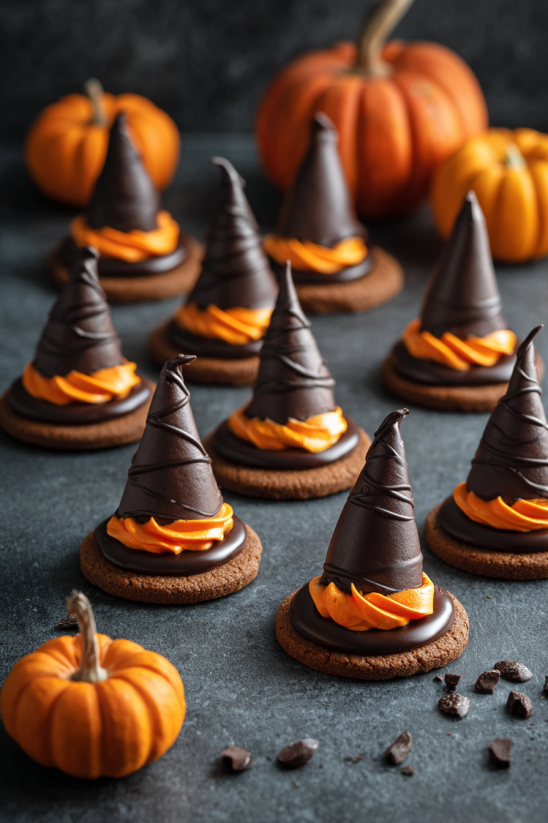
Witch hat cookies have become my go-to for Halloween celebrations because they bring maximum fun to any treat table with almost no effort. These adorable cookie hats look magically festive but require only three ingredients and a few minutes to make. They are perfect if you want a little hands-on kitchen fun with kids or need a last-minute party sweet that will wow everyone.
Each time I make these cookies, the decorating is just as much fun as the eating. Last Halloween, my youngest insisted on adding extra “spooky sprinkles” and we giggled every time a chocolate Kiss toppled over before the icing set.
Ingredients
- Fudge-striped cookies: These make the perfect cookie base with their chocolate lines resembling a hat’s brim Choose ones that are fresh from the package for best texture
- Hershey’s Kisses: These create the tip of the witch hat Look for a variety with festive wrappers or even colored chocolate for extra flair
- Orange decorating icing: This holds everything together and forms the “hat band” around each Kiss Go for a gel icing or a stiff frosting so it sets quickly Good quality icing makes decorating easier and keeps the hat secure
Step-by-Step Instructions
- Prepare the Candies:
- Unwrap all Hershey’s Kisses gently so the chocolate tips do not break Set up an assembly line for quick decorating
- Dot with Icing:
- Squeeze a small spot of orange decorating icing onto the flat base of each Hershey’s Kiss Do not use too much or the Kiss might slip
- Assemble the Hat:
- Press each Kiss, icing side down, onto the chocolate-striped side of a fudge-striped cookie Press until it feels secure but not hard enough to crack the cookie
- Pipe the Hat Band:
- Pipe a thin ring of orange icing around the base where the Kiss meets the cookie Form a neat circle by spinning the cookie slowly as you pipe
- Set and Serve:
- Let the cookies sit at room temperature until the icing is fully set and firm before stacking or serving
 Save
Save
My kids love choosing the color for the hat band each year Sometimes we add tiny candy stars to make them even more magical and create a few purple and green hats for a truly spellbinding mix around the table
Storage Tips
Store finished cookies in a single layer in an airtight container at room temperature They keep well for about three days Avoid stacking until the icing has completely hardened to prevent smudging If making ahead you can prepare the pieces and assemble the day you serve
Ingredient Substitutions
You can use any round chocolate cookie with a flat side if fudge stripes are not available Try chocolate wafer cookies or even vanilla sandwich cookies for a unique look Colored candy melts make a great substitute for icing if you want other vibrant hat bands
Serving Suggestions
Line them up on a platter in a spiral for a witchy centerpiece Dust the plate with green or purple colored sugar for extra color You can also serve alongside other Halloween candies or party finger foods These cookies even make cute toppers for cupcakes
 Save
Save
Cultural Context
Witch hats are an iconic Halloween symbol These cookies playfully mimic that shape and bring a bit of magic to October baking For my family Halloween traditions always involve making sweets together and these cookies have quickly become an annual must do because they are so easy for little hands to assemble
Common Recipe Questions
- → Can I use different colored icing?
Yes, any decorative icing color works. Try purple, green, or classic black for fun variety.
- → Are there alternatives to fudge-striped cookies?
Chocolate wafer cookies or round shortbread can be substituted if fudge-striped aren’t available.
- → How long does the icing take to set?
Depending on humidity and thickness, it typically sets within 20-30 minutes.
- → Can I make these treats ahead?
Absolutely! Store in an airtight container for up to 2 days to keep them fresh.
- → Any tips for assembling with kids?
Pre-unwrap Kisses and set up an icing station so little hands can easily decorate and assemble.