
 Save
Save
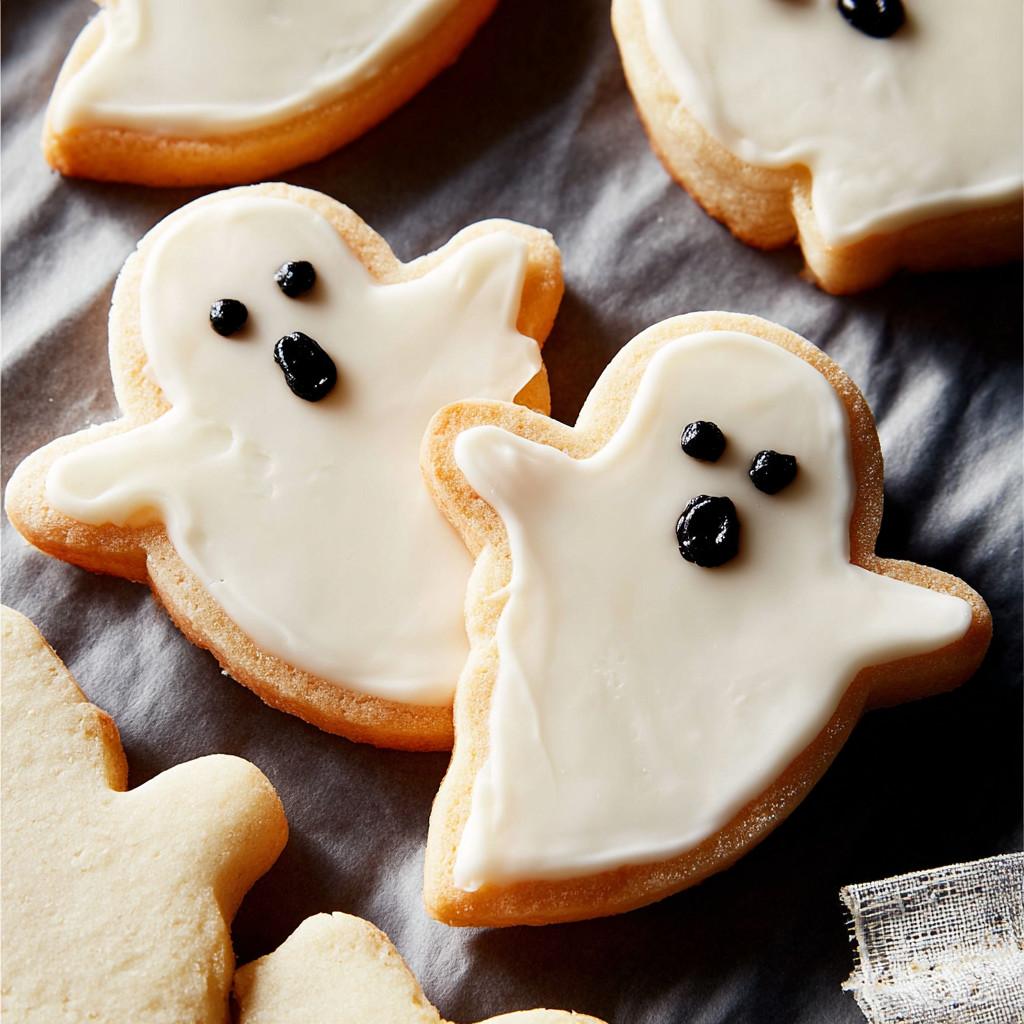
Spooky Ghost Cookies are the stars of every Halloween party in my house. They have the nostalgic flavor of a classic sugar cookie and the kind of charming decoration that makes kids and adults smile. Whether you are baking with little helpers or rushing to put together a last minute treat for a festive gathering these cookies make spooky season cheerful and delicious without stress.
The first time I made these for a Halloween sleepover every single ghost had a silly face The kids insisted on naming each cookie before gobbling them up
Ingredients
- All-purpose flour: provides structure so cookies keep their shape Make sure it is fresh and measure by fluffing then spooning into your measuring cup
- Baking powder: gives just enough lift for a tender bite Check that yours is less than six months old for best rise
- Kosher salt: enhances the buttery vanilla sweetness Taste your salt to ensure it is not too coarse for baking
- Butter: softened to room temperature creates the rich soft texture Use a good quality unsalted butter for best flavor
- Granulated sugar: sweetens the dough and promotes just enough browning
- Large egg: binds everything together and gives a tender crumb
- Milk: adds moisture and tenderness Use whole milk for more flavor if possible
- Pure vanilla extract: infuses classic warmth Choose real vanilla for the best bakery style taste
- Powdered sugar: is essential for silky icing Sift before using to prevent lumps
- Light corn syrup: adds shine and keeps icing soft but set
- Milk for thinning icing: lets you control consistency tightly
- Almond or vanilla extract: brightens icing flavor Choose what fits your taste
- Black food coloring: creates ghostly faces Gel types give a deep color without too much liquid
Step-by-Step Instructions
- Make the Dough:
- In a large bowl whisk flour baking powder and salt very well so rising is even in every cookie
- Cream the Butter and Sugar:
- Beat softened butter and sugar on medium speed until fluffy and pale at least two to three minutes This builds the base for tender cookies
- Mix in Wet Ingredients:
- Add egg milk and vanilla then beat until completely smooth The dough should smell deeply of vanilla at this point
- Combine with Dry Ingredients:
- Gradually add the flour mixture until just absorbed The dough should look soft but not sticky Form into a disk and wrap in plastic
- Chill the Dough:
- Refrigerate for one hour Chilling allows the flour to hydrate and prevents spreading in the oven
- Roll and Cut Cookies:
- Preheat oven to 350 degrees and line two baking sheets with parchment On a lightly floured surface roll dough to one eighth inch thickness Use a ghost shaped cutter to press out cookies rerolling scraps until dough is used up
- Freeze Cutouts:
- Transfer cookies to sheets and freeze for ten minutes This helps hold their shape in the oven
- Bake Cookies:
- Bake for eight to ten minutes until edges are just beginning to color Let cookies cool completely on a wire rack before decorating
- Make the Icing:
- Whisk together powdered sugar corn syrup milk and almond extract until smooth It should be thick and glossy Sift powdered sugar if needed to avoid lumps
- Dye Some Icing Black:
- Scoop out a quarter of the icing and tint black with food coloring Mix in small amounts until you reach a rich black
- Outline Cookies:
- Fill a piping bag with white icing and trace a thick edge around each cookie Make sure it is thick enough not to run
- Flood the Cookies:
- Thin the remaining icing with milk adding a teaspoon at a time Fill another piping bag and flood each cookie with the thinned icing Gently push icing to corners with a toothpick and pop any tiny bubbles
- Let Icing Dry:
- Allow flooded cookies to set for at least fifteen minutes so you have a perfect surface for details
- Add the Faces:
- Fill a piping bag with black icing and pipe eyes and mouths however you like Try silly or spooky
 Save
Save
My favorite ingredient is real vanilla extract The first time I splurged on high quality vanilla I could not believe the difference The fragrance fills the kitchen and every batch since has tasted extra special My little one once drew heart shaped eyes on every single ghost because they loved the smell so much
Storage Tips
Store finished cookies in an airtight container at room temperature for up to four days Separate layers with parchment so decorations stay perfect For longer storage freeze undecorated cookies and ice as needed
Ingredient Substitutions
No corn syrup in the house Swap with honey or agave syrup but note the finish will be less glossy Almond extract is optional but boosts the bakery shop flavor If you want nut free stick with pure vanilla
 Save
Save
Serving Suggestions
Serve ghosts on a big platter with colored candies or use them as party favors in clear bags Tie each bag with orange ribbon for extra festive fun These are also the best cookies for sharing with friends or neighbors because they travel well
Cultural Context
Sugar cut out cookies have long been a part of North American holiday baking I love how the spooky ghost shape gives a playful twist to a classic This recipe is an easy way to make family memories every October without complicated ingredients or fancy steps
Common Recipe Questions
- → How do I keep the ghost shapes sharp while baking?
Chill the dough before baking, and freeze the cutouts for 10 minutes to prevent spreading and keep defined edges.
- → What’s the best way to get smooth icing on cookies?
Outline the cookie with thicker icing, then use slightly thinner icing to fill ('flood') the center for a smooth finish.
- → How do I achieve the right icing consistency?
Add a teaspoon of milk at a time to thin icing. It should flow easily, but not be so thin that it runs off the edges.
- → Can I use vanilla extract instead of almond in the icing?
Yes, vanilla extract works well for a more classic, universally-liked flavor in the cookie icing.
- → How should I store decorated cookies?
Place cookies in an airtight container at room temperature; they'll stay fresh for about 3-4 days.
- → Can leftover dough be frozen?
Yes, wrap extra dough tightly and freeze for later use. Thaw in the refrigerator before rolling out.