
 Save
Save
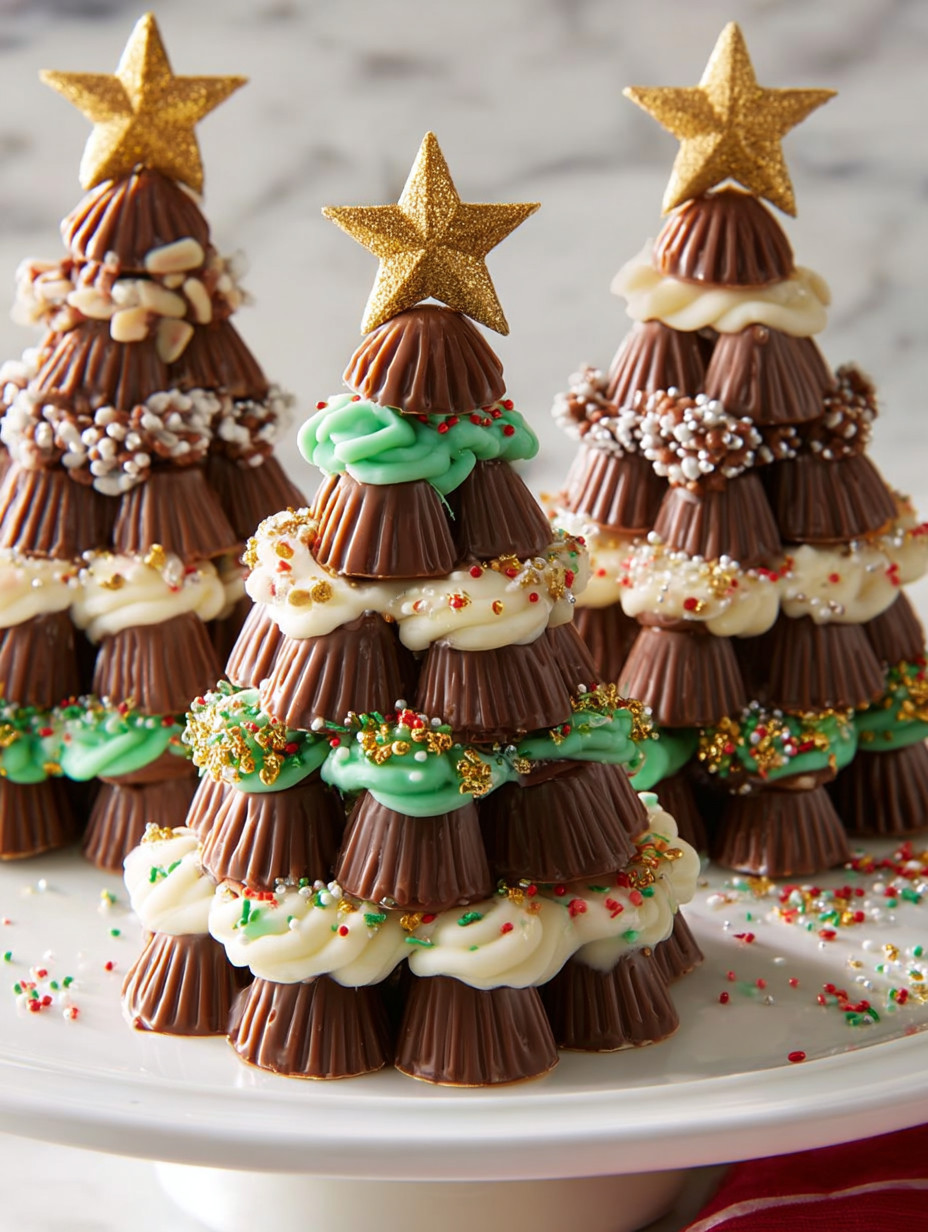
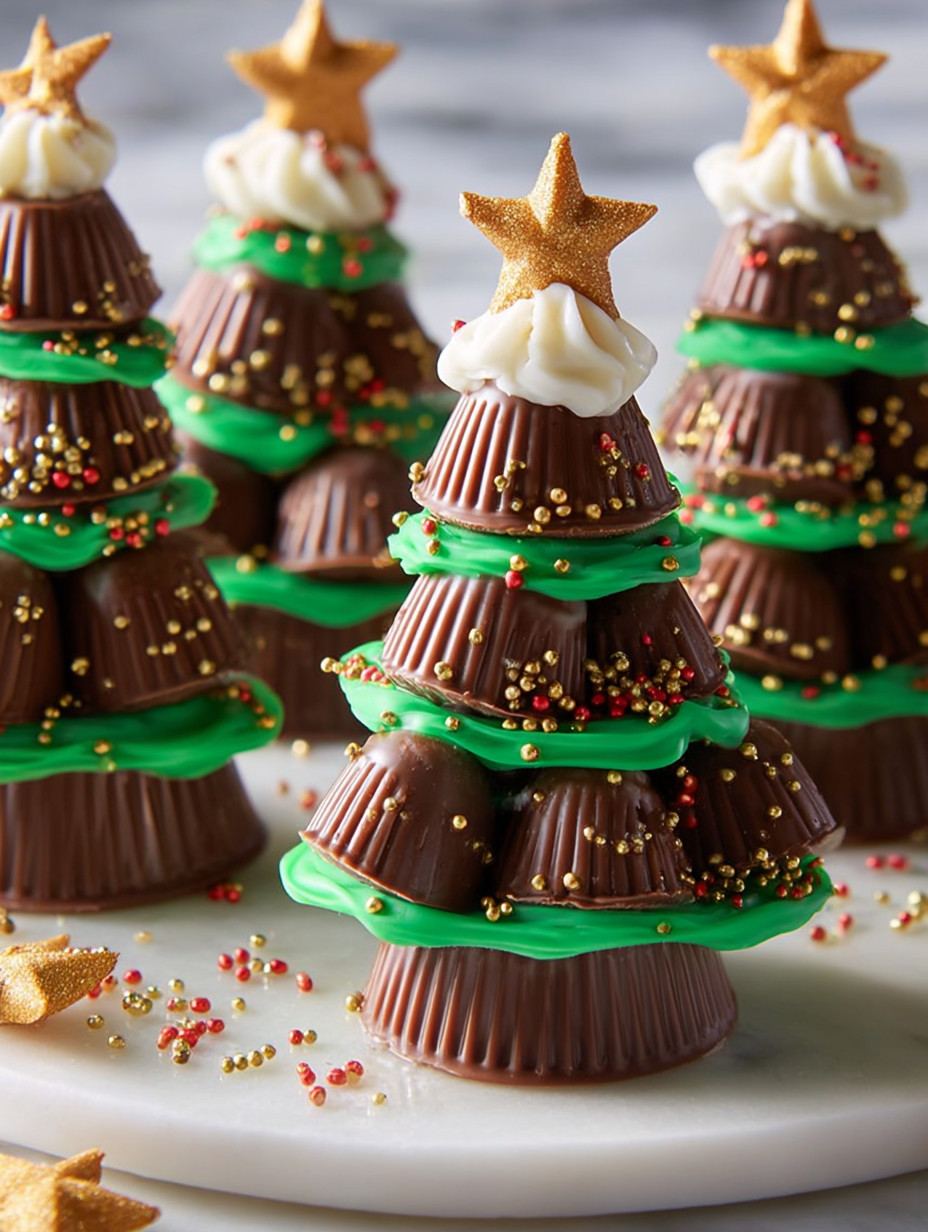
These Reese's Trees make for a quick and festive holiday treat that combines two classic favorites peanut butter and chocolate into a charming edible decoration. They come together in about 10 minutes and are as fun to make as they are to eat, perfect for holiday parties or last-minute gifts.
I first made these with my kids during a holiday baking spree and they loved stacking the peanut butter cups and decorating their trees with icing and sprinkles. It became an instant holiday tradition in our house.
Ingredients
- Chocolate chips: melted really well to act as the glue that holds the trees together. Use good quality chocolate chips for smooth melting.
- Mini Reese’s cups: these form the base and top layers adding the perfect peanut butter flavor in each bite. Choose fresh ones so they’re soft and easy to stack.
- Regular Reese’s cups: for the middle layer upside down for a nice tree trunk effect. Make sure they are at room temperature to avoid cracking when pressing.
- Hershey’s kisses: for the tree topper to give a classic Christmas touch.
- White and green decorating icing: along with sprinkles and gold stars for that festive look. Use icing that pipes easily but holds its shape well.
- Optional confectioners’ sugar: to dust over the finished trees like fresh snow on a winter day.
Step-by-Step Instructions
- Sculpt the Tree Structure:
- Place a small dollop of melted chocolate on the bottom of a mini Reese’s cup. This is your tree base so make sure the chocolate is warm but not too hot. Arrange a regular Reese’s cup upside down on top and press gently just enough to bond. Add a little more melted chocolate on the upside-down Reese’s cup for secure stacking. Then add another mini Reese’s cup upside down on this layer. Finish by dabbing melted chocolate at the top and place a Hershey’s kiss press it lightly so it stays but does not squish the treats.
- Decorate the Garland and Accents:
- Use white and green decorating icing to pipe garland around the stacked cups. Don’t rush pipe slowly so the icing forms pretty swirls and not blobs. Shower the trees with colorful sprinkles while the icing is still wet so they stick well. Add a touch of more icing carefully to the top of the Hershey’s kiss and adhere a gold star for a festive crown.
- Add Snowy Finishing Touch:
- If using confectioners’ sugar dust the finished trees lightly with a sifter or small sieve to mimic freshly fallen snow. This is optional but really adds that holiday charm and extra sweetness.
 Save
Save
I love how the Reese’s cups create a perfect peanut butter and chocolate ratio each bite. It’s a nostalgic combo that reminds me of decorating cookies with my mom when I was young. The little Hershey’s kiss on top always brings out the kid in me.
Storage Tips
Store these trees on a single layer in a cool dry place away from direct sunlight or heat to avoid melting. If your kitchen is warm I recommend refrigeration but bring them back to room temperature before serving to avoid hardened chocolate.
Storage Tips
Avoid stacking the trees on top of each other so they don’t stick together or get squished.
Ingredient Substitutions
If you cannot find Hershey’s kisses substitute with any chocolate candy shaped like cones that has a pointy top or small decorative candy stars to stick on top. Mini peanut butter cups from other brands also work but try to pick ones with similar size for a neat finish. If you want a nut free option try crunch peanut butter cups made without peanuts but expect a slightly different flavor.
Serving Suggestions
These Reese’s trees pair wonderfully with a glass of cold milk or hot cocoa for dipping. Serve them as party favors arranged on a festive tray with a dusting of snowflake confetti or edible glitter to impress guests. They also make cute cupcake toppers when broken apart more carefully.
Pro Tips
Make sure your melted chocolate is smooth and warm but not hot to avoid melting the peanut butter cups when stacking. Do not rush piping the icing take your time for neat decoration it makes a big difference visually. Use a small offset spatula or butter knife to gently spread any extra melted chocolate if needed for better stability.
Common Recipe Questions
- → What types of peanut butter cups are used?
Both mini and regular-sized peanut butter cups are layered to create the tree shape.
- → How is the tree structure held together?
Melted chocolate acts as glue to securely stack the peanut butter cups and hold the Hershey's kiss topper in place.
- → What decorating options enhance these treats?
Colorful sprinkles, piping icing as garlands, gold stars, and a dusting of confectioners' sugar mimic snow and add festive charm.
- → Can I customize the decorations?
Absolutely — you can use any icing colors, sprinkles, or edible decorations that fit your holiday theme.
- → How long does assembly take?
Assembly is quick and simple, typically taking around 10 minutes to complete all trees.