
 Save
Save
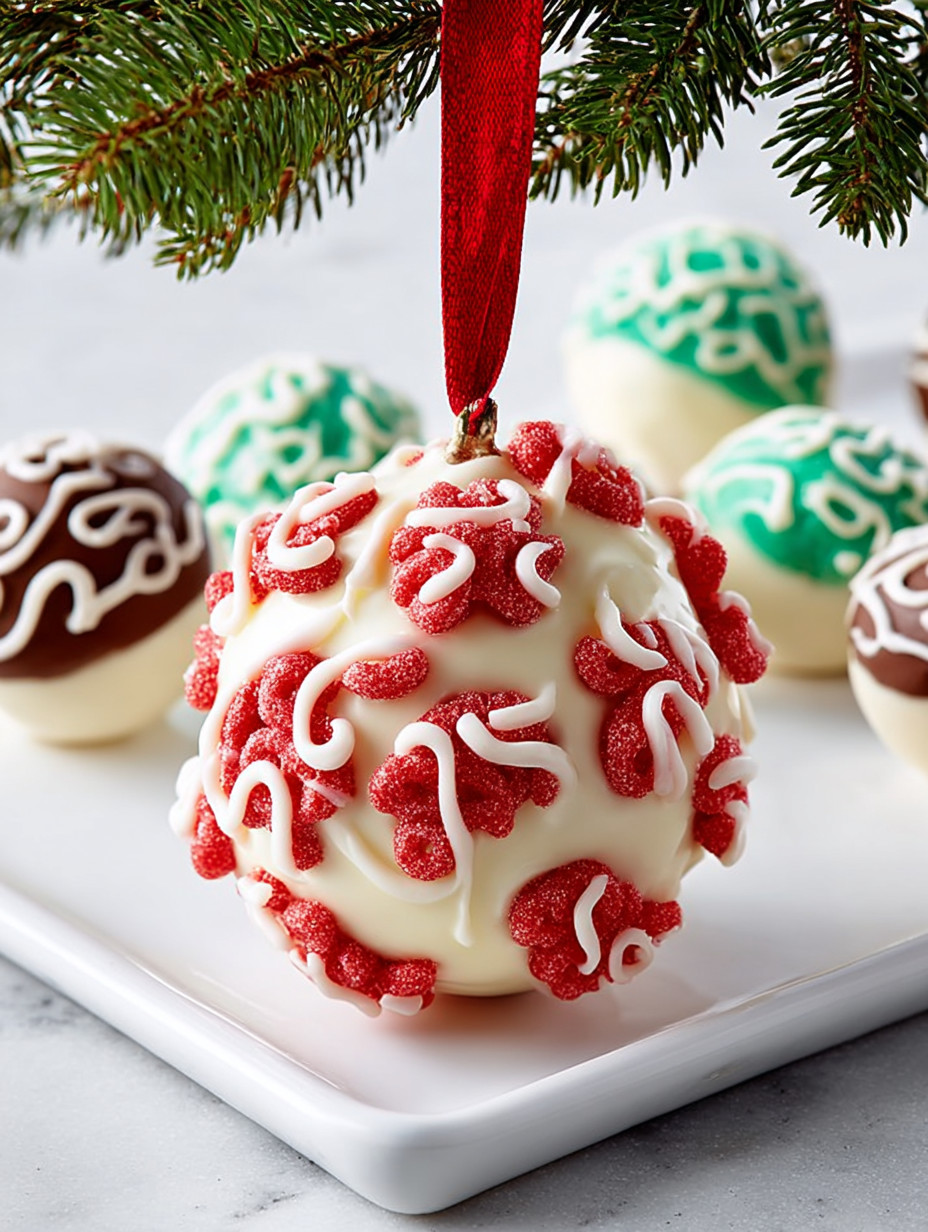
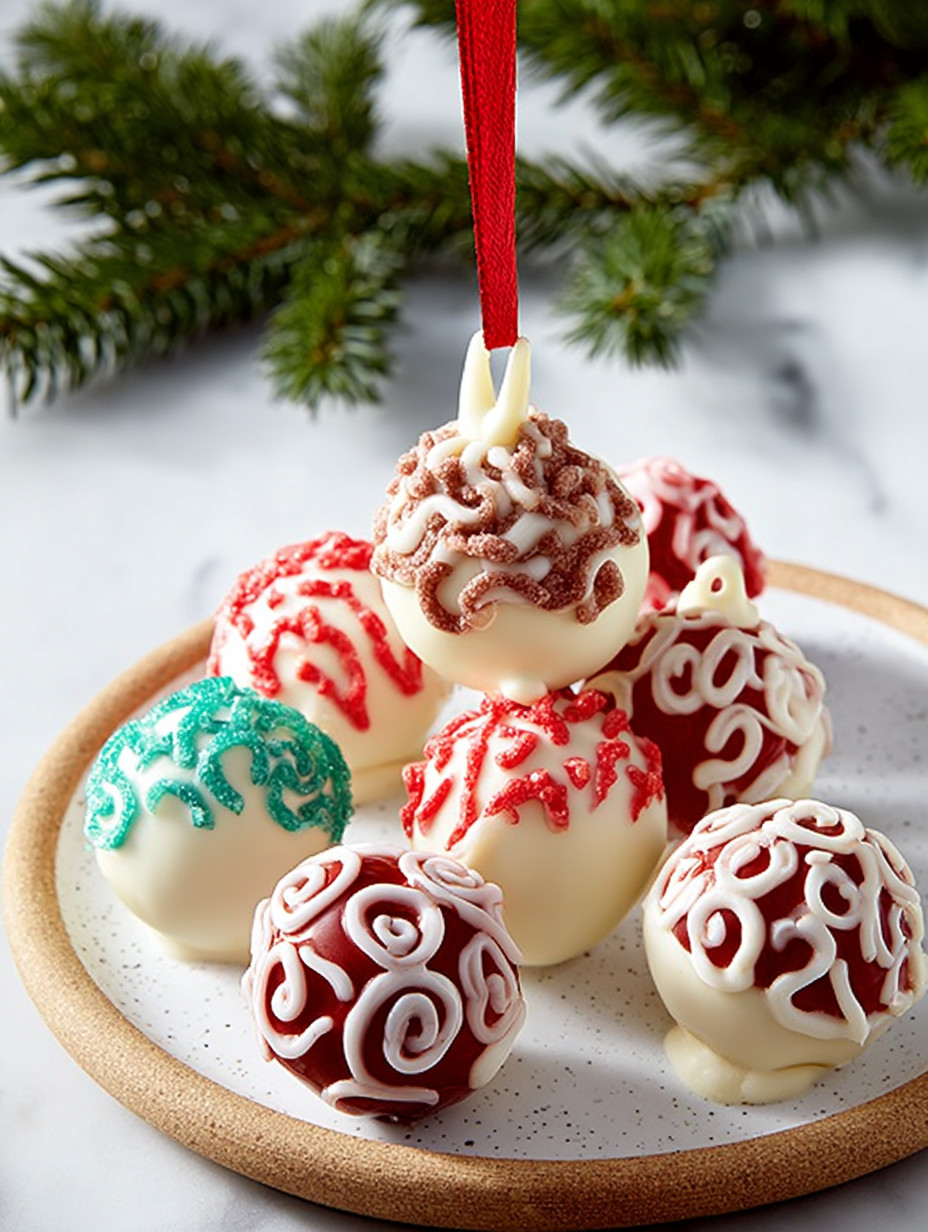
These festive cake ball ornaments capture the joyful spirit of the holidays with rich red velvet cake combined with tangy cream cheese frosting. They are perfect for gifting, sharing at cookie swaps, or serving at holiday parties. The bright candy coatings and fun decorating ideas turn simple cake balls into a beautiful array of edible holiday cheer.
I first made these during my busiest holiday season and was thrilled how quickly they came together. Now they are a must-make every year to bring festive smiles.
Ingredients
- Cooking spray: which helps keep the cake from sticking to the pan when baking
- One box of red velvet cake mix: for that classic deep flavor and vibrant red color, you can choose a high quality brand for better taste
- Cream cheese: softened for smoothness and tang that balances the sweetness
- Unsalted butter: softened to add richness without extra salt
- Confectioners' sugar: which provides sweetness without graininess and helps create a smooth frosting consistency
- Pure vanilla extract: for subtle warmth and enhancing the flavors
- Kosher salt: to balance the sweetness and enhance overall taste
- Frosted Cheerios: used creatively to make hooks for the ornaments adding a unique touch
- Green, red, and white candy melts: for colorful coatings and decoration, opt for good quality melts for smooth dipping and taste
- Sanding sugar: adds sparkle and texture for the finishing touch
Step-by-Step Instructions
- Sift and Prepare the Batter:
- Preheat your oven to 350 degrees Fahrenheit. Grease a 13 by 9 inch baking pan thoroughly with cooking spray to ensure the cake releases easily. In a large bowl, prepare the red velvet cake mix exactly according to the package instructions, combining all required ingredients. Pour the batter evenly into the prepared pan and smooth the surface lightly.
- Bake and Cool the Cake:
- Place the pan in the oven and bake for about 25 to 30 minutes. Use a cake tester or toothpick to check doneness when inserted in the center, it should come out clean. Remove the pan from the oven and let the cake cool completely in the pan to avoid crumbling when handled.
- Prepare the Frosting:
- In a large mixing bowl, beat the softened cream cheese and butter together on medium-high speed using a handheld mixer until the mixture appears light and fluffy, approximately 2 to 3 minutes. Slowly add the confectioners' sugar and continue beating until fully incorporated. Stir in the vanilla extract and a pinch of kosher salt to balance the flavors.
- Form the Cake Balls:
- Crumble the fully cooled cake into fine crumbs directly into the frosting mixture. Use a spoon or spatula to mix until evenly combined creating a pliable dough-like texture. Shape the mixture into one and a half inch balls using your hands or a cookie scoop to keep sizes uniform, aiming for approximately 34 total. Place them on a baking sheet and refrigerate for at least one hour to firm up.
- Create the Cereal Hooks:
- Lay 34 Frosted Cheerios flat on another baking sheet for the base. Take one remaining cereal piece and hold it upright, dip the bottom in melted white candy melt to act as glue, then attach it to the center of a flat piece to form a hook shape. Let the hooks set completely.
- Dip and Decorate Cake Balls:
- Divide the cake balls into three equal groups. Dip one group into melted green candy melts, another into red candy melts, and the last into white candy melts. Shake off any excess coating gently. While the coating is still wet, sprinkle some cake balls with sanding sugar to create a sparkling effect. Allow the dipped balls to set on the baking sheet for about 15 to 20 minutes.
- Pipe Details and Attach Hooks:
- Transfer about three-quarters of the remaining white candy melt into a resealable plastic bag and snip a tiny corner to create a piping bag. Use this to pipe festive designs onto the dried cake balls, immediately adding sanding sugar before the candy hardens. Dip the bottom of each cereal hook into the melted white candy and carefully place them onto the top of each cake ball, pressing lightly to secure.
 Save
Save
Storage Tips
Store finished cake ball ornaments in an airtight container in the refrigerator for up to one week. They maintain freshness best when kept chilled because of the cream cheese in the frosting. For longer storage, freeze the cake balls separated by parchment paper to avoid sticking and thaw in the refrigerator before serving.
Ingredient Substitutions
- You can swap the boxed red velvet mix for a homemade red velvet cake if you want more control over ingredients or freshness
- Cream cheese can be replaced with mascarpone for a richer, creamier texture but the flavor will be less tangy
- If you do not have sanding sugar, granulated sugar works but will not sparkle the same way
Serving Suggestions
These cake ball ornaments are delightful on their own accompanied by hot chocolate or spiced cider. They also make fun individual servings in party favor bags or displayed on a festive platter as part of a cookie exchange. Consider pairing with other holiday treats for a colorful dessert table.
Common Recipe Questions
- → How do I keep the balls from falling apart during dipping?
Chilling the formed balls in the fridge for at least one hour firms them up, helping maintain shape during the candy coating process.
- → What’s the best way to melt candy melts without overheating?
Heat candy melts slowly at 50% microwave power or defrost mode, stirring frequently to avoid burning or thickening.
- → Can I prepare these ahead of time?
Yes, undipped balls can be refrigerated up to two days before coating, and finished treats store well in the fridge or freezer.
- → How do I attach ornament hooks to the balls?
Dip the bottom of a small cereal 'hook' into melted white candy and stick it on top of the set cake balls before the coating hardens.
- → What helps smooth out thick candy melts?
Adding a small amount of shortening to the melted candy improves consistency and eases dipping.