 Save
Save
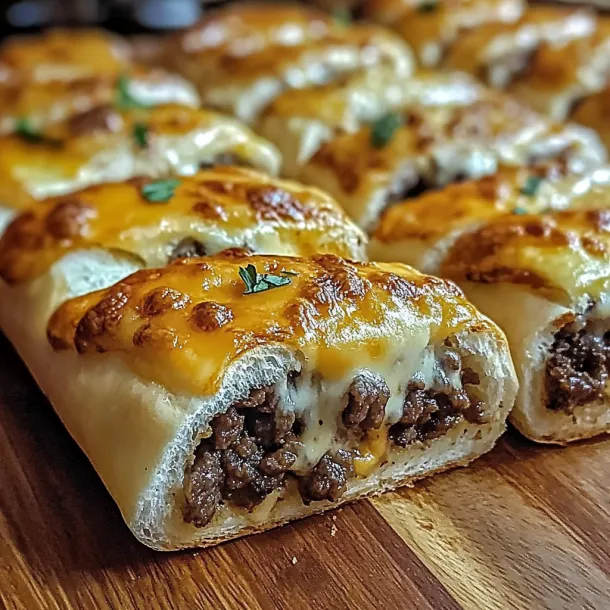
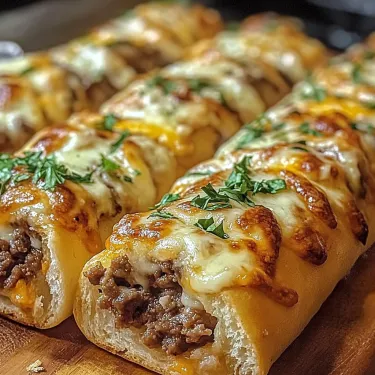
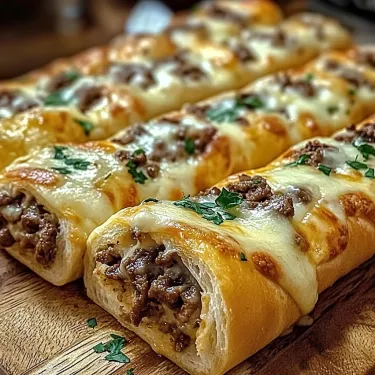
This handheld twist on a Philadelphia classic brings all the flavors of a traditional cheesesteak into a portable, shareable form that's perfect for game days, casual gatherings, or a fun family dinner. The combination of tender steak, caramelized onions, and bell peppers wrapped in cheesy pizza dough creates an irresistible snack that disappears quickly from any table.
I first created these stuffed breadsticks when hosting friends for a championship basketball game. The traditional sandwich format seemed too messy for my living room setup, but these hand-held versions were the perfect solution. They've since become our most requested game day tradition.
Ingredients
- 1 lb pizza dough: Store bought saves time but homemade adds extra flavor if you have the time
- ½ lb thinly sliced ribeye or sirloin steak: Traditional choice that provides the best flavor and texture
- ½ cup sliced onions: Sweetens as they caramelize creating that authentic cheesesteak base
- ½ cup sliced green bell peppers: Adds freshness and crunch to balance the rich filling
- 1 cup shredded mozzarella cheese: Provides that essential melty stretch when pulled apart
- ½ cup shredded provolone cheese: Brings the authentic Philadelphia cheesesteak flavor
- 1 tablespoon olive oil: High quality oil makes a difference in how the vegetables caramelize
- ½ teaspoon salt: Enhances all the flavors without making the filling too salty
- ½ teaspoon black pepper: Freshly ground provides the best flavor profile
- 2 tablespoons melted butter: Creates that irresistible golden exterior
- 1 teaspoon garlic powder: Infuses the crust with savory aroma
Step-by-Step Instructions
- Prepare the Filling:
- Cook onions and peppers in olive oil over medium heat for 4 to 5 minutes until they develop a slight caramelization around the edges. The vegetables should soften but still maintain some texture. Add the thinly sliced steak to the pan with salt and pepper, cooking just until the meat loses its pink color but remains tender about 4 minutes. Avoid overcooking as the meat will continue cooking in the oven. Allow mixture to cool slightly so it doesnt melt the cheese prematurely.
- Prepare the Dough:
- Preheat your oven to 425°F and line a baking sheet with parchment paper. Roll the pizza dough on a lightly floured surface into a rectangle approximately ¼inch thick. Work carefully to maintain even thickness throughout ensuring consistent baking. The rectangle should measure roughly 10 by 14 inches for optimal filling distribution.
- Assemble the Breadsticks:
- Arrange the cooled steak mixture down the center third of the dough leaving a one inch border at the top and bottom. Distribute the filling evenly to ensure each bite contains the perfect balance of ingredients. Sprinkle both cheeses over the filling creating a generous layer that will melt into all the nooks and crannies of the meat mixture.
- Create the Breadstick Shape:
- Cut 1inch wide strips at an angle along both sides of the dough from the edge to about ½ inch from the filling. Fold the top and bottom edges over the filling then cross the strips over the filling alternating from side to side creating a braided appearance. This seals the filling inside while creating the classic breadstick look.
- Add Finishing Touches:
- Combine melted butter with garlic powder and brush this mixture generously over the entire surface of the dough. This step not only adds flavor but helps create that golden brown crust that makes breadsticks irresistible. Sprinkle with a pinch of extra salt if desired for enhanced flavor.
- Bake to Perfection:
- Bake in the preheated oven for 18 to 20 minutes until the breadsticks are deeply golden brown and the cheese inside is completely melted. The dough should sound hollow when tapped indicating it is fully cooked through. Allow to cool for 5 minutes before slicing to prevent the filling from spilling out.
 Save
Save
My family debates whether these are better than traditional cheesesteaks, but the ability to dip them in marinara sauce or garlic aioli gives these breadsticks a definite edge in my book. I remember serving these at my sons graduation party and they vanished before any other dish on the table.
Make Ahead Options
These breadsticks work beautifully as a make ahead option. You can prepare the filling up to two days in advance and store it in an airtight container in the refrigerator. The assembled but unbaked breadsticks can be refrigerated for up to 8 hours before baking just add 2 3 minutes to the baking time if cooking from cold. For longer storage you can freeze the assembled breadsticks on a baking sheet then transfer to a freezer bag once solid. Bake from frozen adding 5 7 minutes to the cooking time.
Perfect Pairings
While these breadsticks are substantial enough to serve as a main course with a simple side salad they also make excellent appetizers. Consider serving them with a variety of dipping sauces like marinara roasted garlic aioli warm cheese sauce or even a spicy mayo. For a complete Philadelphia themed spread pair them with a classic Italian hoagie salad loaded with salami provolone and Italian herbs in a vinaigrette dressing.
Troubleshooting Tips
If your breadsticks are browning too quickly on top but still doughy inside lower the oven temperature to 375°F and extend the baking time by 5 7 minutes. If your filling feels too wet after cooking drain it on paper towels before adding to the dough to prevent soggy breadsticks. For a perfectly sealed breadstick dampen the edges of the dough strips with water before folding them over the filling creating a better seal when they bake.
 Save
Save
Common Recipe Questions
- → Can I make these ahead of time?
Yes, you can prepare the filling and assemble the breadsticks up to 24 hours ahead. Keep them covered in the refrigerator and bake just before serving. You may need to add 2-3 minutes to the baking time if cooking from cold.
- → What's the best dipping sauce to serve with these breadsticks?
Marinara sauce works wonderfully, but ranch dressing, garlic aioli, or even a cheese sauce complement the flavors nicely. For an authentic Philadelphia touch, try serving with a side of cheese sauce.
- → Can I use other types of meat instead of steak?
Absolutely! While ribeye or sirloin gives the most authentic Philly flavor, you can substitute with chicken, ground beef, or even portobello mushrooms for a vegetarian version. Deli roast beef is also a quick time-saving alternative.
- → How do I prevent the breadsticks from getting soggy?
Make sure to let the filling cool slightly before assembling. Also, don't overload the dough with filling, and ensure your oven is fully preheated to 425°F to quickly seal the dough. Lastly, drain any excess liquid from the meat and vegetable mixture.
- → How should I store and reheat leftovers?
Store cooled leftovers in an airtight container in the refrigerator for up to 3 days. Reheat in a 350°F oven for 5-7 minutes until warmed through. You can also use an air fryer at 325°F for 3-4 minutes for extra crispness. Avoid microwaving if possible as it can make the breadsticks soggy.
- → Can I freeze these breadsticks?
Yes, you can freeze them either before or after baking. To freeze unbaked breadsticks, place them on a baking sheet until solid, then transfer to a freezer bag. Bake from frozen, adding 5-7 minutes to the cooking time. For baked breadsticks, cool completely, wrap individually, and freeze for up to 2 months. Reheat in a 350°F oven until warmed through.
