
 Save
Save
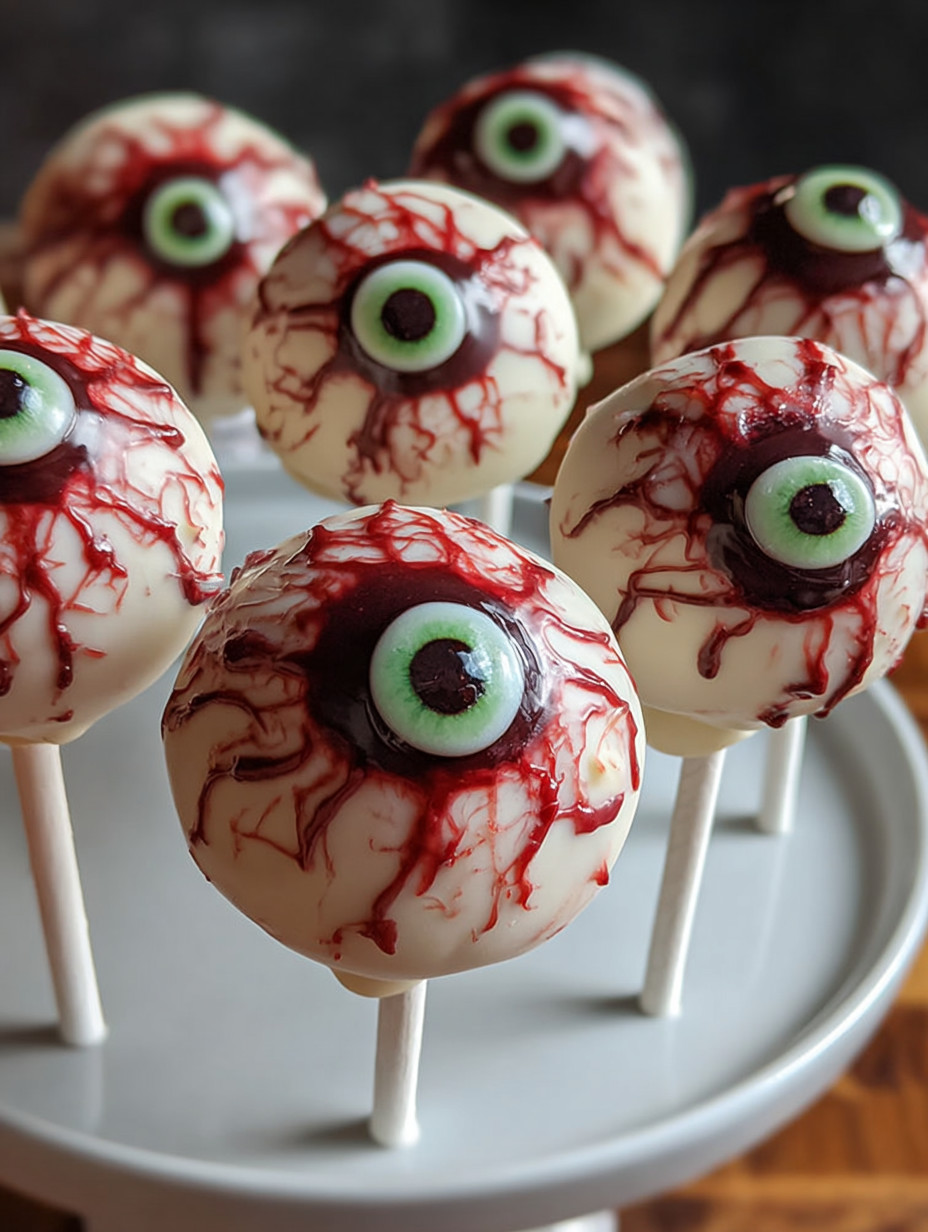
These Monster Eyeball Cake Pops bring a spooky twist to your usual sweet treats, perfect for Halloween or any fun family gathering. They are easy enough for busy days yet creative enough to enjoy decorating with the kids. Making these pops combines baking with a bit of craft, turning your kitchen into a festive spot for spooky fun.
I first tried making these during a hectic Halloween week. The kids loved adding the creepy veins with food coloring, and it quickly became a favorite in our household. Now, whenever October rolls around, these pops are a must-have on our dessert table.
Ingredients
- Box of cake mix: Choose your favorite flavor such as chocolate or vanilla for a versatile base
- Frosting: One cup adds moisture and sweetness to bind the cake crumbs flavored frosting can enhance taste
- White chocolate melts: These melt smoothly creating the perfect white coating for eyeball appearance
- Food coloring red and green: Used to create the spooky veins, adding the creepy effect
- Chocolate chips: Dark chocolate chips serve as pupils providing contrast on the white coating
- Lollipop sticks: Essential for making cake pops easy to hold and display ensure they are sturdy
Step-by-Step Instructions
- Prepare the Cake Mix:
- Preheat the oven as directed on the cake mix box. Mix the cake batter according to package instructions. Baking the cake fills your kitchen with a wonderful scent that sets a festive mood.
- Crumble the Cake:
- Once cooled, crumble the cake using your hands or fork into fine pieces resembling sand. This step is quite relaxing and the perfect way to prepare for the next stage.
- Mix in the Frosting:
- Add frosting gradually to the crumbled cake and mix until moist but not sticky. Adjust with a little more frosting if dry, as this binds the mixture and infuses flavor.
- Form the Cake Balls:
- Roll the mixture into one-inch balls and set them on parchment-lined baking sheets. This hands-on fun is great to get kids involved and makes shaping easier.
- Freeze the Cake Pops:
- Insert lollipop sticks into each cake ball then place the tray in the freezer for about 30 minutes. Freezing helps the pops hold their shape during the chocolate dip.
- Melt the White Chocolate:
- In a microwave-safe bowl melt the white chocolate melts in short bursts, stirring frequently for a smooth consistency. Overheating can cause clumping so be cautious.
- Dip the Cake Pops:
- Dip each cake ball fully into the melted white chocolate allowing excess to drip off before placing back on the baking sheet. This coating forms the base for your eyeballs.
- Add the Pupils:
- Before the chocolate sets, gently press one chocolate chip into the center of each cake pop to create the pupil. This detail brings the monster eyeballs to life.
- Create the Veins:
- Use a toothpick or small tool to drizzle red and green food coloring over the white coating creating vein patterns. Each eyeball can be uniquely decorated for extra creepiness.
- Let Set and Serve:
- Allow the cake pops to set completely, refrigerating if needed to speed up the process. Once firm, arrange them on a festive platter ready to enjoy.
 Save
Save
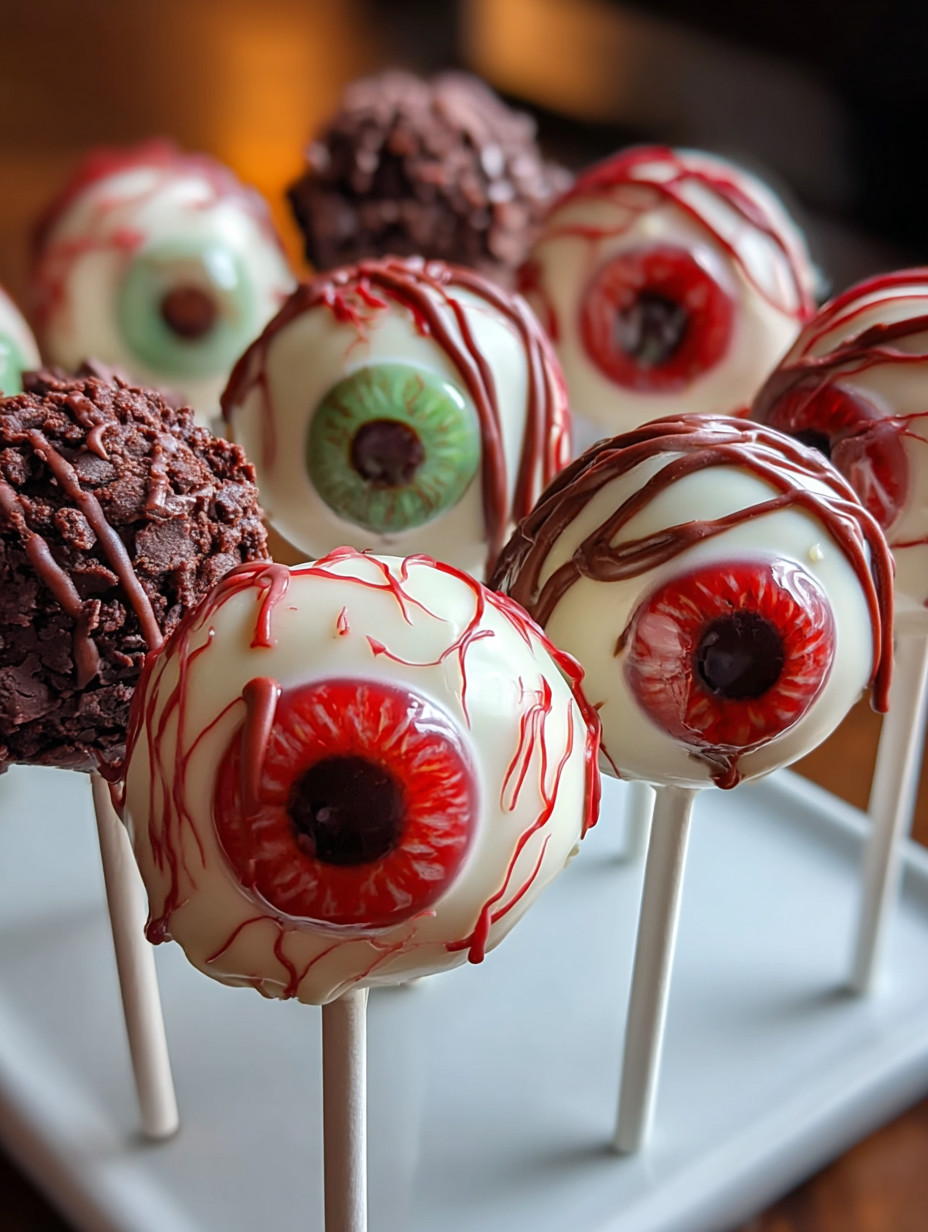
My favorite part is the simple chocolate chip pupils. They turn plain white balls into little monsters that always draw smiles from kids and adults alike. One year, my youngest named each eyeball and insisted they had personalities making the process hilarious and memorable.
Storage Tips
Store your Monster Eyeball Cake Pops in an airtight container in a cool place or the fridge to prevent chocolate melting. They stay fresh up to a week but are best enjoyed within a few days when the cake texture is softest. Avoid storing in warm areas to keep the coating intact.
Ingredient Substitutions
If you prefer you can use milk or dark chocolate melts instead of white chocolate for dipping but note the eye effect will differ in color. You may substitute lollipop sticks with sturdy pretzel sticks for a salty contrast. Vegan frosting and dairy-free chocolate make a great plant-based alternative for this recipe.
Serving Suggestions
Serve these cake pops alongside apple cider or a festive punch to enhance the spooky experience. Presenting them on a dark platter with fake spider webs or Halloween decorations adds to the eerie vibe. Adding gummy worms or candy corn as side treats offers guests variety and extra fun.
Pro Tips
- Always cool the cake completely before crumbling to avoid a soggy mix that won’t hold well
- Use a cookie scoop or measuring spoon to make uniform cake balls for even dipping and baking
- Do not skip the freezing step this is key to keeping your cake pops firm during chocolate coating
Common Recipe Questions
- → Can I make these cake pops ahead of time?
Yes, preparing them a day in advance works well. Store in an airtight container in a cool place to keep their shape and freshness.
- → What can replace white chocolate melts?
Milk or dark chocolate melts can be used instead, though the eyeball colors will appear different but still taste delicious.
- → How should leftover cake pops be stored?
Keep leftovers in an airtight container in the fridge. They stay fresh up to a week but are often enjoyed sooner!
- → Are there alternative decoration ideas for the eyeballs?
Absolutely. Try colored sprinkles, edible glitter, or candy eyes to customize the spooky effect.
- → Are these treats kid-friendly?
Yes, they’re great for kids to help create and enjoy. Just keep an eye on ingredients if allergies are a concern.