
 Save
Save
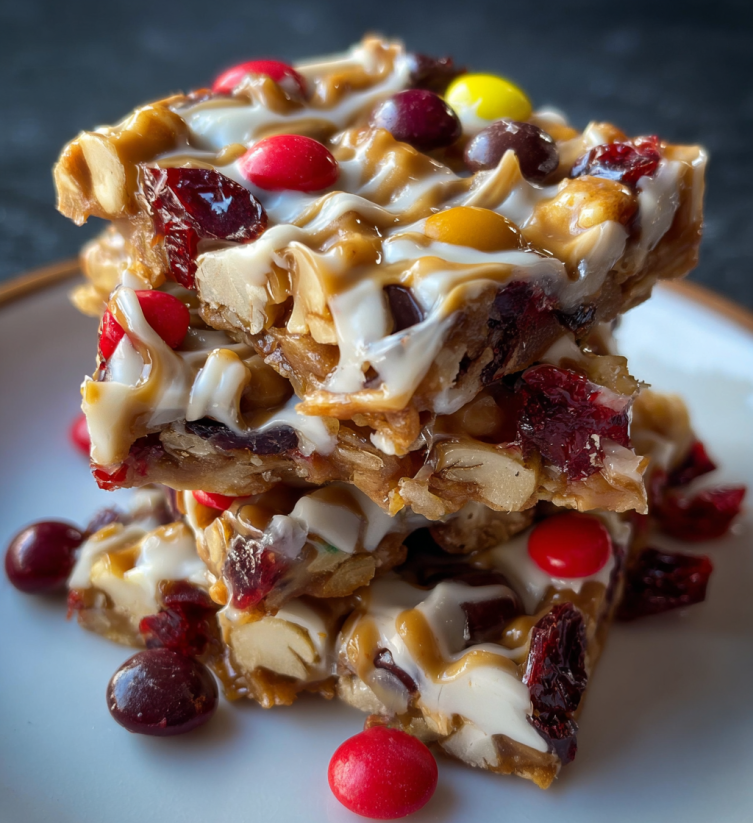
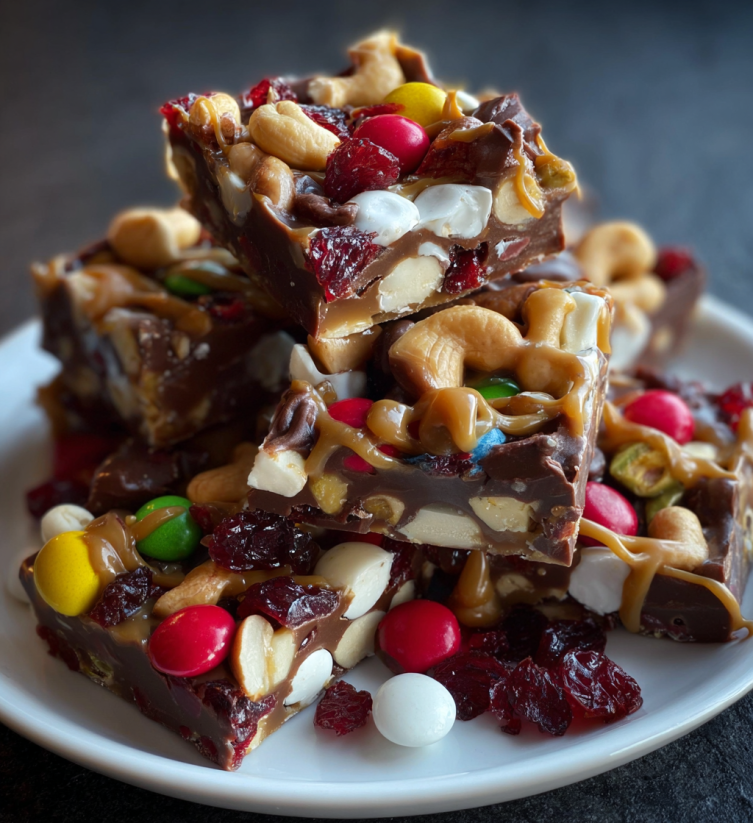
When the holidays roll around, there is nothing more comforting or festive than making a fresh batch of homemade Christmas candy. The aroma of sugar and vanilla fills the kitchen, and every piece becomes a sweet gift you can share or savor by the fire. This is a recipe I turn to whenever I want to spark joy and bring a bit of old-fashioned magic to our family celebrations. Once you break that glossy, nut-studded candy into craggy shards, you will understand why this one disappears so quickly at every gathering.
My first Christmas making this candy was a snowy night when the power flickered but joy glowed from everyone helping break the slab into shards. Now it is a tradition that feels like the heart of our winter celebrations.
Ingredients
- Granulated sugar: provides the backbone for the candy base choose a fine white sugar for easy melting
- Corn syrup: helps provide that satisfying snap and prevents unwanted crystallization look for clear corn syrup in baking aisles
- Water: ensures smooth dissolving and keeps the mixture from scorching filtered water works best
- Vanilla extract: brings warmth to the finished flavor use pure extract for the richest aroma
- Chopped nuts: such as walnuts or pecans add richness and crunch fresh nuts have better flavor than pre-chopped
- Chocolate chips: optional but wonderful for drizzling use semi sweet or dark for best contrast and shine melt just before drizzling
Select the freshest nuts you can find and check that your vanilla is pure rather than imitation to let the holiday flavors shine.
Step-by-Step Instructions
- Combine Sugar Corn Syrup and Water:
- In a medium heavy bottomed saucepan blend your sugar corn syrup and water together. Stir gently over medium heat until the sugar fully dissolves and no grains remain on the side of the pan.
- Boil Until Hard Crack Stage:
- Increase the heat and let the mixture come to a rolling boil. Use a candy thermometer if you have one. Watch closely until it hits around three hundred degrees Fahrenheit which is the hard crack stage. This usually takes about ten to fifteen minutes and the liquid will look clear and bubbly.
- Add Flavor and Nuts:
- Carefully take the pan off the heat. Immediately stir in your vanilla extract then pour in the chopped nuts. Work quickly but gently to combine so all the nuts are coated.
- Pour and Spread:
- Pour the hot mixture onto a well greased baking sheet or onto parchment. Use a spatula to spread it into an even layer. The hot syrup is very sticky and can burn so be very cautious with this step.
- Cool Completely:
- Let the candy sit on the counter until fully cool and firm. This takes about half an hour. Do not put in the fridge to speed things up or you risk losing the glassy shine.
- Break and Finish:
- Once set break the slab into rustic pieces. If using chocolate melt your chips and use a fork or spoon to drizzle over the shards. Cool until set again and then transfer to a serving dish or gift box.
 Save
Save
My favorite part has always been sneaking a still warm piece from the slab while the chocolate drizzle is just beginning to set. Every year my younger sister tries to claim the biggest nut packed shard and it always sparks laughter in the kitchen.
Storage Tips
Keep your finished candy in an airtight container to maintain its crunch and shine. A glass or sturdy plastic jar works well. Store at room temperature tucked away from direct sunlight or humidity. If your kitchen is extra warm you can refrigerate but let the candy return to room temperature before serving for the best texture. Eat within a week for peak freshness though it often disappears faster around here.
Ingredient Substitutions
For those with nut allergies try toasted seeds like pumpkin or sunflower for a similar crunch. Honey can sometimes be swapped for corn syrup though the flavor will be more floral and the texture slightly chewier. If you want to skip the chocolate simply sprinkle a pinch of flaky sea salt on the hot candy for a sweet salty finish.
Serving Suggestions
This candy shines piled high on holiday platters and tucked into small cellophane bags as thoughtful homemade gifts. For a cozy movie night pair with a mug of hot cocoa or sprinkle bits over vanilla ice cream for a simple elegant dessert.
 Save
Save
Cultural and Historical Context
Homemade candies have been a winter tradition in many cultures where sugar work brought families together around the stove. Recipes like this one echo the spirit of holiday markets and childhood memories of sneaking sweets before dinner was served.
I will never forget the first year I added a dash of cinnamon to the batch after reading an old cookbook. That small change instantly became a family request for every Christmas since.
Common Recipe Questions
- → Can I use different sweeteners instead of sugar?
Yes! Honey or maple syrup can be used, but expect a change in texture and taste. Adjust quantities to achieve the right consistency.
- → How do I know when the candy is ready if I don't have a thermometer?
Drop a spoonful into cold water—if it forms a hard ball that holds its shape, it's ready for pouring onto your sheet.
- → Is it possible to add food coloring for a festive touch?
Absolutely! Stir in a few drops of your favorite colors after adding the nuts to create colorful, eye-catching treats.
- → What’s the best way to store the finished candy?
Allow the candy to cool completely, then store in an airtight container in a cool, dry space for up to a week.
- → Can I double the batch for larger gatherings?
Yes, simply use a larger pot and monitor the temperature closely as increasing the quantity may affect cooking time.
- → Are there creative ways to customize the flavor?
Try mixing in dried fruits, a pinch of cinnamon, or sprinkle sea salt on top for unique variations tailored to your taste.