
 Save
Save
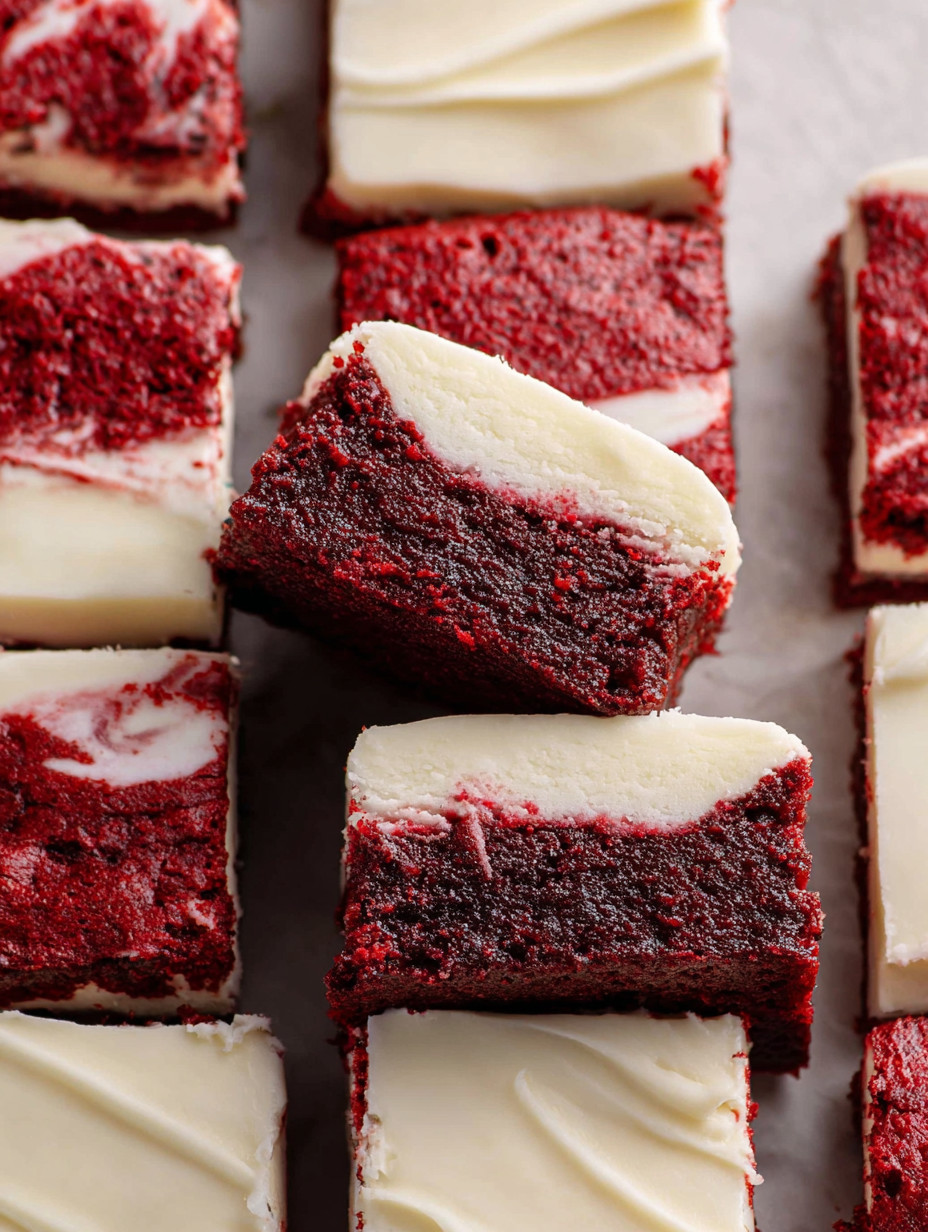
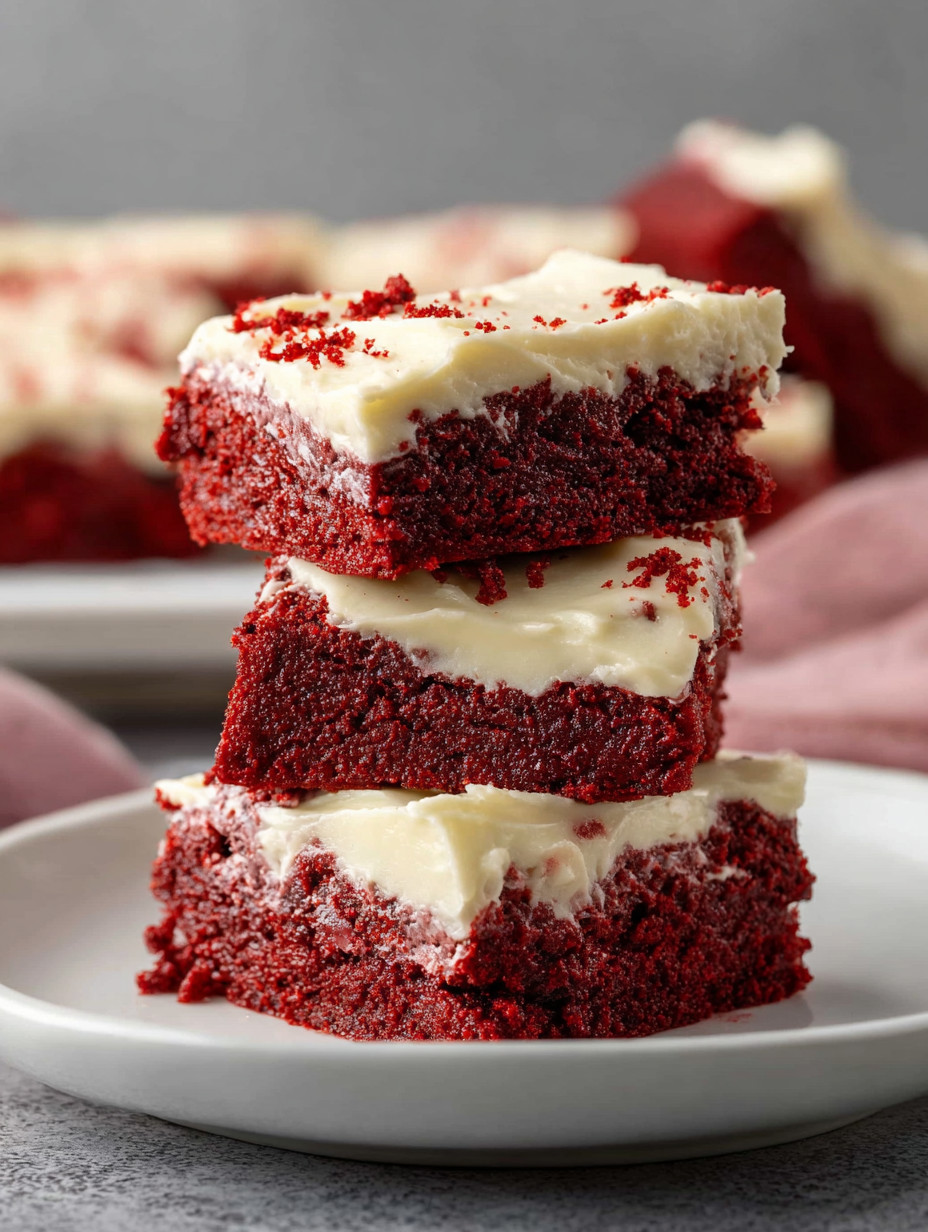
These chewy red velvet brownies are a delicious treat topped with smooth cream cheese frosting. They capture the classic red velvet flavor with the richness of cocoa powder, a touch of white vinegar, and just the right amount of red food coloring. Whether you want to indulge in a dairy-free version or stick with traditional ingredients, these brownies deliver every time. The combination of the tender brownie and creamy topping makes them a perfect dessert for holidays, bake sales, or any day you want something special.
I remember making this recipe during a family gathering and watching everyone’s eyes light up as they tasted the first bite of these rich, soft brownies topped with luscious frosting. It quickly became a favorite that I get asked to bake all year long.
Ingredients
- Butter: use regular or dairy-free butter to suit your needs better quality butter will result in a richer flavor
- Cream cheese: opt for full-fat for the best texture and tang but non-dairy cream cheese works well too for allergies
- Cornstarch: this helps thicken the frosting especially important if using dairy-free cream cheese tapioca starch is a good substitute
- Red food coloring: either liquid or gel work keep in mind that different brands have different intensities so adjust accordingly
- White vinegar: adds an authentic tang and helps create that signature red velvet flavor
- Granulated sugar and light brown sugar: sugar adds sweetness and moisture contributing to that soft chewy texture
- Cocoa powder: use unsweetened to give that subtle chocolate flavor that defines red velvet
- Flour: use all-purpose flour for structure measuring accurately is key to avoiding dense brownies
- Vanilla extract: enhances all the flavors and gives a warmer note
- Salt: balances the sweetness and highlights the chocolatey taste
- Powdered sugar: is used in the frosting for smooth sweetness and the desired thickness
Step-by-Step Instructions
- Preheat the Oven:
- Set your oven to 350 degrees Fahrenheit and line an 8 by 8 inch square baking pan with parchment paper. Make sure the parchment paper hangs over the edges to help with removing the brownies later.
- Prepare the Brownie Batter:
- Melt the butter gently either on the stove or in the microwave. Transfer it to a medium bowl. Add the granulated and light brown sugar and whisk until the mixture becomes thick and starts to pull away from the sides of the bowl like a paste.
- Add Wet Ingredients:
- Break in the egg then add white vinegar vanilla extract and red food coloring. Mix thoroughly. If the red color is not vibrant enough feel free to add a few more drops of the food coloring until you reach your preferred shade.
- Mix the Dry Ingredients:
- Sift in the cocoa powder salt and flour to the wet mixture. Whisk gently just until everything is combined. Be careful not to over mix or the brownies could get tough.
- Bake the Brownies:
- Pour the batter into your prepared pan and smooth the top. Bake in the oven for 30 to 40 minutes. Start checking at 30 minutes by inserting a toothpick in the center. The brownies are done when the top is crinkly and the toothpick comes out with some moist crumbs but not wet batter.
- Cool Completely:
- Allow the brownies to cool fully in the pan before adding the frosting. This can take some patience but is worth it so the frosting does not melt.
- Make the Cream Cheese Frosting:
- Using a handheld or stand mixer beat together the cream cheese butter salt and vanilla extract until smooth. Gradually add powdered sugar and beat until you reach your desired thickness. If using dairy-free cream cheese add a teaspoon or two of cornstarch to help thicken and stabilize the frosting.
- Frost the Brownies:
- Once the brownies are fully cooled spread the cream cheese frosting evenly over the top. For clean slices chill the frosted brownies briefly before cutting.
 Save
Save
The interplay between the tangy cream cheese frosting and the mild chocolate infused red velvet brownie is my favorite flavor combination. One family holiday I remember everyone fighting over the last piece of these brownies because they loved the moist crumb and that creamy topping so much.
Storage tips
Store frosted brownies in the fridge covered to keep the frosting fresh for three to four days. If you want to store unfrosted brownies keep them in the pan covered at room temperature for the same amount of time. The frosting can be stored separately in the fridge and spread on the brownies when you are ready to serve them. For longer storage you can freeze the unfrosted brownies wrapped tightly in plastic wrap and foil. Thaw completely before frosting.
Ingredient substitutions
If you do not have cornstarch you can use tapioca starch in the frosting especially when making the dairy-free version. For the red food coloring try gel colors for a more intense shade and less liquid in your batter. Coconut oil or vegetable oil can replace butter but will slightly change the texture and flavor of the brownies. For a vegan version substitute the egg with flaxseed meal mixed with water but the texture may be less chewy.
Serving suggestions
These brownies are wonderful served on their own or with a scoop of vanilla ice cream or fresh berries for a light contrast. They also make a great gift wrapped in a pretty box for bake sales or a thoughtful handmade treat for friends and family. Try pairing them with a cup of hot coffee or tea as the cream cheese and cocoa flavors complement warm beverages beautifully.
Cultural context
Red velvet cake has roots in the southern United States and has a history tied to the early 20th century when food coloring and cocoa powder became popular baking ingredients. It is recognized for its unique subtle chocolate flavor with a tangy profile often attributed to the vinegar and buttermilk traditionally used. These brownies adapt that classic profile into a portable treat that is easier to bake and enjoy without the multiple layers.
Common Recipe Questions
- → What gives the brownies their classic red velvet flavor?
The combination of white vinegar, cocoa powder, and red food coloring creates the traditional tangy taste and signature color.
- → How can I make the frosting dairy-free?
Use dairy-free cream cheese and butter substitutes, adding cornstarch to thicken the frosting if needed.
- → Why might my brownies take longer to bake?
Baking in a glass dish can slow heat conduction; using an aluminum pan helps ensure even baking and proper texture.
- → Can I prepare the batter and frosting ahead of time?
Yes, store the unfrosted brownies covered at room temperature and keep the frosting refrigerated until ready to use.
- → How can I ensure the brownies are moist and not dense?
Accurately measure flour and cocoa powder using a kitchen scale or the scoop-and-level method to maintain the right texture.
- → Is it possible to adjust the pan size?
Doubling ingredients for a 9×13-inch pan works well; just monitor baking time between 20 to 35 minutes.