
 Save
Save
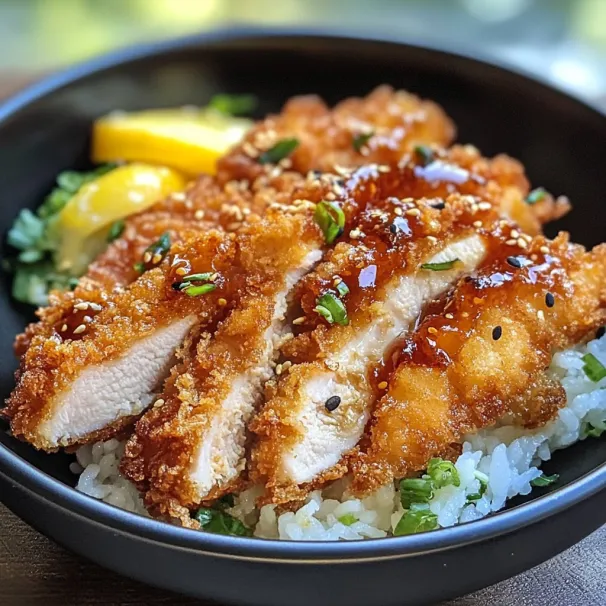
This crispy chicken katsu has been my secret weapon for impressing dinner guests with minimal effort. The contrast between the crunchy panko exterior and juicy chicken interior creates an irresistible texture that pairs perfectly with the tangy tonkatsu sauce.
I discovered this recipe during my college years when I was searching for affordable yet impressive meals. One bite of this homemade katsu transported me straight to my favorite Japanese restaurant, and I've been perfecting my technique ever since.
Ingredients
- Boneless skinless chicken breasts provide the perfect canvas for this dish. Look for ones that are similar in size for even cooking.
- All purpose flour creates the first layer of coating that helps everything stick. Use unbleached for a slightly nuttier flavor.
- Eggs act as the essential binding agent. Farm fresh eggs with vibrant yolks add extra richness.
- Panko breadcrumbs are the star ingredient that gives katsu its signature crunch. Always use authentic Japanese panko for the best texture.
- Vegetable oil with a high smoke point ensures perfect frying without burning. Canola or peanut oil works beautifully.
- White rice serves as the traditional base. Short grain Japanese rice offers the perfect sticky texture.
- Shredded cabbage provides a fresh, crisp contrast to the fried chicken. Slice it extra thin for the authentic experience.
- Tonkatsu sauce delivers that sweet umami finish. Look for Bull Dog brand for the most authentic flavor.
- Sesame seeds add a nutty garnish and visual appeal. Toast them lightly before sprinkling for enhanced flavor.
Step-by-Step Instructions
- Prepare the Chicken
- Place chicken breasts between plastic wrap and pound to an even 1/2 inch thickness. This ensures quick and even cooking while tenderizing the meat. Season generously with salt and pepper on both sides to build flavor from the ground up.
- Set Up Breading Station
- Arrange three shallow bowls side by side. Fill the first with flour, the second with beaten eggs, and the third with panko breadcrumbs. Having everything in order makes the breading process much cleaner and more efficient.
- Bread the Chicken
- Dredge each chicken breast thoroughly in flour, ensuring complete coverage but shaking off excess. Next, dip into beaten eggs, allowing any excess to drip off. Finally, press firmly into panko breadcrumbs on both sides, making sure the entire surface is coated. The pressing motion is crucial for proper adhesion.
- Fry to Golden Perfection
- Heat oil to approximately 350°F in a large skillet. The proper temperature is crucial. Too hot and the coating burns before the chicken cooks. Too cool and the breading absorbs too much oil. Lower chicken pieces gently into the oil and fry for 4 to 5 minutes per side until deeply golden and crisp. The sizzle should be constant but not aggressive.
- Rest and Slice
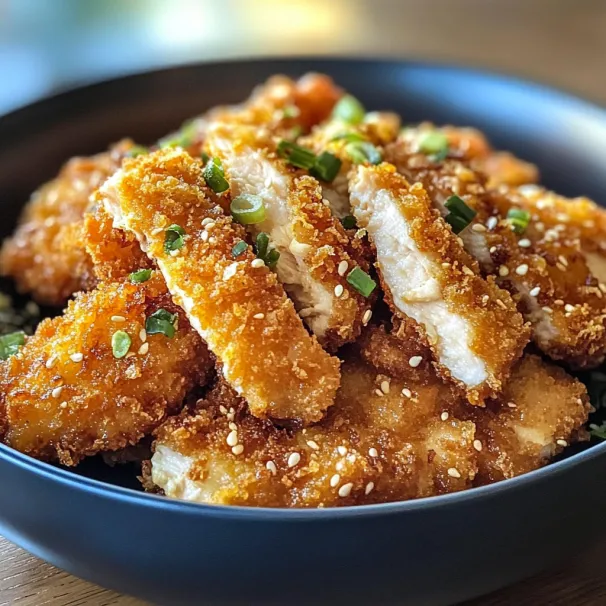
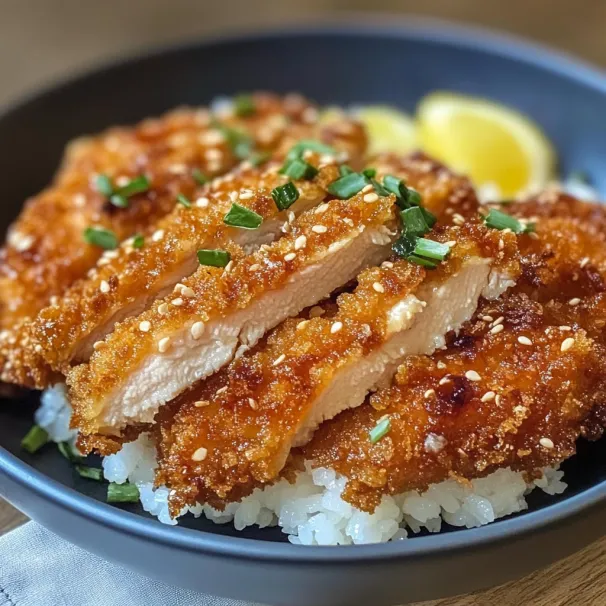
- Transfer the fried katsu to paper towels to absorb excess oil. Allow it to rest for 3 to 5 minutes before slicing. This crucial step helps the juices redistribute throughout the meat. Cut into strips against the grain for maximum tenderness.
- Plate and Serve
- Arrange sliced katsu alongside a mound of white rice and a bed of finely shredded cabbage. Drizzle with tonkatsu sauce and sprinkle with toasted sesame seeds. The presentation should showcase all components clearly on the plate.
 Save
Save
One of my favorite memories with this dish was cooking it for my Japanese friend who claimed it tasted just like her grandmother's version. The secret was taking extra time to properly pound the chicken and being patient with the frying temperature. That moment of culinary validation made all the difference in my confidence with Japanese cooking.
The Secret to Extra Crispy Katsu
The key to achieving that signature crunch lies in the panko breadcrumbs and proper oil temperature. Unlike regular breadcrumbs, panko has a flakier, airier texture that creates more surface area for frying. For maximum crispiness, try chilling your breaded chicken in the refrigerator for 15 minutes before frying. This helps the coating adhere better and creates an even crispier exterior when it hits the hot oil.
Healthier Variations
While traditional katsu is fried, you can create delicious alternatives with different cooking methods. For air fryer chicken katsu, spray the breaded chicken with oil and cook at 380°F for about 15 minutes, flipping halfway. The result is remarkably crispy with significantly less oil. Oven baked katsu works well too. Bake at 400°F for 20 minutes, then broil for 2 minutes to achieve a golden crust. Both methods retain the satisfying crunch while reducing the calorie count by nearly 40%.
Serving Beyond the Basic Bowl
While the classic presentation with rice and cabbage is delicious, chicken katsu shines in various applications. Transform leftovers into a katsu sandwich by placing slices between soft milk bread with tonkatsu sauce and extra cabbage. For a fusion twist, use katsu as a topping for curry rice, where the crispy texture stands up beautifully to rich Japanese curry sauce. You can also slice it thin atop ramen or udon for an upgraded noodle bowl experience with contrasting textures.
Cultural Context
Chicken katsu exemplifies yoshoku cuisine, Western influenced Japanese cooking that emerged during the Meiji Restoration period. Originally inspired by European schnitzel, the Japanese adaptation focused on lighter breading and specialized accompaniments like shredded cabbage and tonkatsu sauce. While pork was the traditional protein, chicken gained popularity for its accessibility and lighter flavor profile. Today, katsu remains one of Japan's most beloved comfort foods, represented in everything from casual dining to convenience store bento boxes.
 Save
Save
Common Recipe Questions
- → Can I use chicken thighs instead of breasts for Chicken Katsu?
Yes, chicken thighs work excellently for Katsu and many prefer them for their juicier texture and richer flavor. They typically require a similar cooking time but can be more forgiving if slightly overcooked. Just ensure you pound them to an even thickness for consistent cooking.
- → How can I make Chicken Katsu healthier?
For a healthier version, bake your breaded chicken at 400°F (200°C) for 20-25 minutes, flipping halfway through. Alternatively, use an air fryer at 375°F for about 15 minutes. Both methods use significantly less oil while still achieving a crispy exterior. You can also use whole wheat panko for added fiber.
- → What is tonkatsu sauce and can I make it at home?
Tonkatsu sauce is a sweet and tangy Japanese condiment similar to Worcestershire sauce but thicker and fruitier. To make it at home, combine 3 tablespoons ketchup, 1 tablespoon Worcestershire sauce, 1 tablespoon oyster sauce, 2 teaspoons sugar, and 1 teaspoon soy sauce. Adjust to taste.
- → What sides pair well with Chicken Katsu?
Traditional accompaniments include steamed white rice and shredded cabbage with tonkatsu sauce. Other excellent pairings include cucumber sunomono (vinegar salad), miso soup, Japanese potato salad, pickled vegetables (tsukemono), or a simple green salad with ginger dressing.
- → Can Chicken Katsu be prepared in advance?
You can bread the chicken up to 24 hours in advance and store it covered in the refrigerator. For best results, fry just before serving. Alternatively, fully cooked katsu can be refrigerated for 2-3 days and reheated in an oven at 350°F for 10-15 minutes to restore some crispiness.
- → What's the difference between Chicken Katsu and Tonkatsu?
The main difference is the protein used. Chicken Katsu uses chicken cutlets, while Tonkatsu specifically refers to breaded and fried pork cutlets. The preparation method, breading, and accompaniments are essentially the same for both dishes.