
 Save
Save
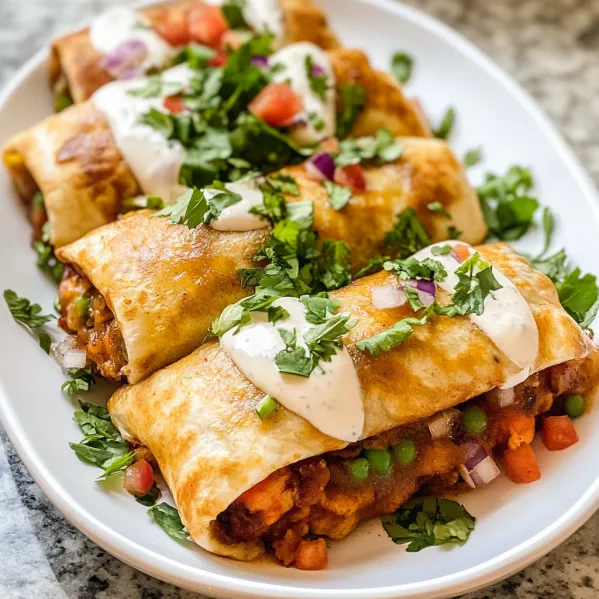
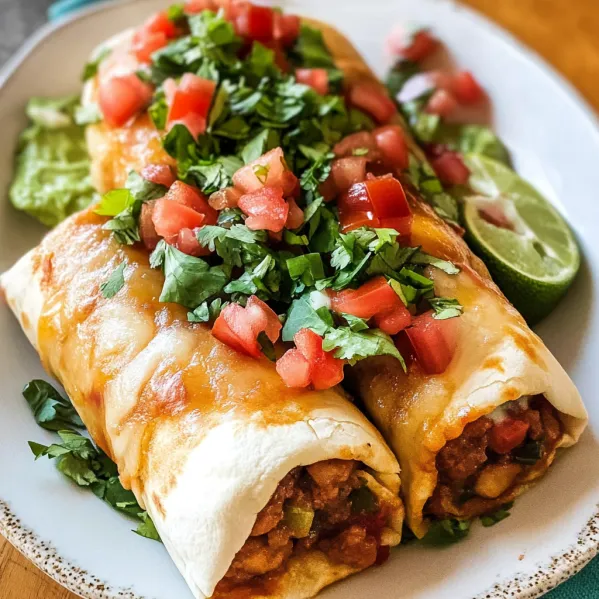
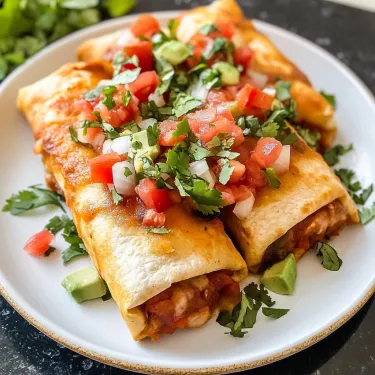
This crispy golden chimichanga recipe transforms ordinary burritos into an extraordinary Mexican feast that will have your family requesting them weekly. The perfect balance of seasoned chicken, beans, and cheese wrapped in a flour tortilla then fried to perfection creates that satisfying crunch we all crave.
I discovered this recipe during a Mexican food craving that couldn't be satisfied by takeout. After perfecting the technique, these chimichangas have become our Friday night tradition, with my kids fighting over who gets the last one.
Ingredients
- Vegetable oil: creates that signature crispy exterior without making the chimichanga greasy
- Chicken breast: provides lean protein and absorbs all the wonderful spices
- Onion, garlic, and jalapeño: build the aromatic foundation that makes these irresistible
- Chili powder, cayenne, and garlic powder: the perfect spice blend for authentic Mexican flavor
- Flour tortillas: look for the larger burrito size for proper wrapping
- Monterey Jack cheese: melts beautifully inside without becoming oily
- Pinto beans: add heartiness, fiber, and authentic Mexican flavor
- Red wine vinegar: provides acidity that balances the richness of the fried exterior
- Fresh cilantro: brightens the entire dish with its distinctive herbal notes
Step-by-Step Instructions
- Cook the Chicken:
- Heat oil in a large skillet over medium high heat until shimmering. Add diced chicken and cook for 5 to 7 minutes until no longer pink and slightly browned on the edges. The browning creates deeper flavor. Add onions, garlic and jalapeños, cooking for another 3 to 4 minutes until onions become translucent and aromatic.
- Create the Flavor Base:
- Sprinkle the chili powder, cayenne, garlic powder and flour evenly over the chicken mixture. Stir constantly for 2 to 3 minutes to toast the spices and cook out the raw flour taste. The mixture will become fragrant and slightly thickened. This step is crucial for developing intense flavor.
- Develop the Sauce:
- Pour in chicken broth and red wine vinegar, using a wooden spoon to scrape up all the flavorful browned bits from the bottom of the pan. Reduce heat to medium low and simmer for 10 minutes, stirring occasionally, until the liquid reduces and creates a thick sauce that coats the chicken. The consistency should be moist but not watery.
- Complete the Filling:
- Add pinto beans, lime juice and half the cilantro to the skillet. Gently fold everything together and cook for 3 more minutes until beans are heated through. Taste and adjust seasoning if needed. The filling should be bold and well seasoned as the tortilla will dilute the flavor.
- Prepare for Frying:
- Heat a half inch of vegetable oil in a deep skillet to 325°F. The proper temperature is crucial too hot and the outside will burn before the inside warms, too cool and the chimichangas will absorb excess oil and become greasy. Use a thermometer for accuracy.
- Assemble with Care:
- Place a warm tortilla on a flat surface and spoon about ¾ cup of filling slightly below the center. Add 2 tablespoons of cheese on top of the filling. Fold the bottom edge over the filling, then fold in both sides, and continue rolling away from you to create a secure package. Place seam side down while you assemble the remaining chimichangas.
- Achieve Golden Perfection:
- Carefully place 3 to 4 chimichangas seam side down into the hot oil. Fry for 2 minutes until golden brown, then gently flip and fry the other side for another 2 minutes. The ideal chimichanga has an even, crispy golden exterior. Transfer to paper towels to drain excess oil, then keep warm in a 200°F oven while frying remaining batches.
- Serve with Style:
- Create a base of shredded lettuce on each plate, topped with a spoonful of salsa. Place the crispy chimichangas on top, then add dollops of sour cream and additional salsa. Finish with diced tomatoes and the remaining fresh cilantro. The contrast of hot, crispy chimichanga with cool, fresh toppings makes this dish exceptional.
 Save
Save
My absolute favorite component is the red wine vinegar. It might seem like a small addition, but that touch of acidity cuts through the richness of the fried exterior and makes all the flavors pop. The first time I served these to my family, my husband declared them better than our favorite Mexican restaurant's version. That moment solidified this recipe in our regular rotation.
Proper Storage Technique
Storing fried chimichangas requires careful attention to maintain their crispy texture. Allow them to cool completely on paper towels to absorb excess oil before refrigerating. Store in an airtight container with a paper towel on the bottom to prevent sogginess. When reheating, avoid the microwave which will make them soggy. Instead, place them in a 350°F oven for 10 15 minutes until heated through and crispy again. This method restores that freshly fried texture we all love.
 Save
Save
Customization Options
While the chicken and bean filling is traditional, chimichangas welcome endless variations. Try substituting ground beef seasoned with the same spice blend for a heartier version. Vegetarians can double the beans and add sautéed bell peppers and corn. For a breakfast version, fill with scrambled eggs, chorizo, and potatoes. No matter what filling you choose, maintain the proper ratio of moist filling to crispy shell for the perfect texture contrast.
Serving for a Crowd
Chimichangas make an impressive party dish because they can be prepared ahead and fried just before serving. For entertaining, set up a topping bar with guacamole, multiple salsas, sliced jalapeños, and pickled red onions. Serve with Mexican rice and refried beans for a complete fiesta. For a lighter approach, offer a citrusy cabbage slaw instead of lettuce. The interactive nature of customizing toppings makes this a fun meal for gatherings.
Common Recipe Questions
- → How do I prevent my chimichangas from becoming soggy?
To keep chimichangas crisp, drain as much oil as possible after frying by placing them on paper towels. Make sure your filling isn't too wet by using a slotted spoon if necessary. Allow them to cool completely before refrigerating, as condensation from warm chimichangas will create moisture. Store in an airtight container with paper towels to absorb excess oil.
- → Can I freeze leftover chimichangas?
Yes! Let chimichangas cool completely, then wrap each one individually in a layer of plastic wrap and foil, or place in sealable freezer bags. They can be stored in the freezer for up to 4 months. To reheat, unwrap and heat in a 350°F oven until hot and crispy again.
- → What protein alternatives can I use in chimichangas?
While this recipe calls for chicken breast, you can easily substitute with ground beef, shredded pork, steak strips, or even plant-based proteins like seasoned tofu or tempeh. Just ensure your alternative protein is well-seasoned and not too wet before rolling into the tortillas.
- → How do I know when the oil is ready for frying chimichangas?
Heat the oil to 325°F using a thermometer for best results. If you don't have a thermometer, test by dropping a small piece of tortilla into the oil - it should sizzle immediately and float to the top, bubbling gently. If it sinks or browns too quickly, adjust your temperature accordingly.
- → What sides pair well with chimichangas?
Chimichangas pair beautifully with Mexican rice, refried beans, corn salad, or a simple avocado salad. For a complete spread, consider serving with guacamole, queso dip, and a variety of salsas ranging from mild to spicy. A light citrus-dressed cabbage slaw also provides a refreshing contrast to the rich, fried chimichangas.
- → How do I properly wrap a chimichanga to prevent it from unfolding during frying?
Place the filling in the center of the tortilla, leaving about an inch of space from the edges. Fold the bottom edge over the filling, then fold in both sides tightly. Continue rolling upward until you reach the opposite end. If needed, secure with a toothpick before frying. Make sure not to overfill, as this can cause the tortilla to tear or burst during cooking.