
 Save
Save
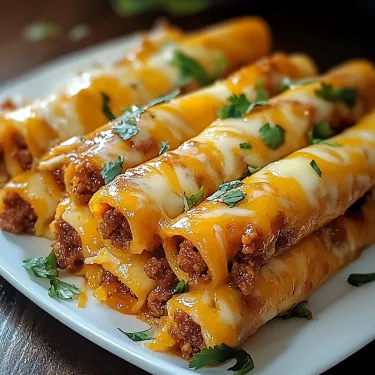
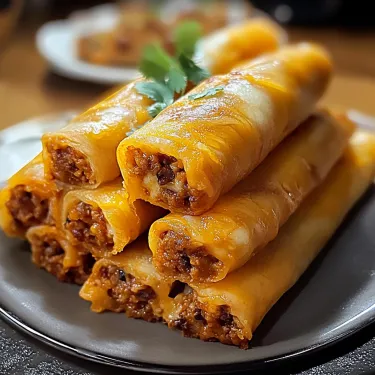
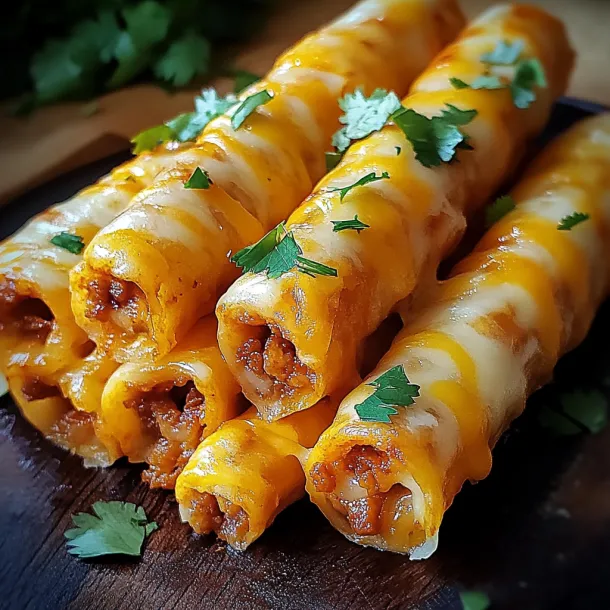
This hearty cheesy taco sticks recipe transforms traditional taco night into a portable, fun treat that both kids and adults adore. I created these when searching for a game day snack that would satisfy my family's Mexican food cravings without the mess of traditional tacos.
I first made these during a football Sunday when we needed something we could eat while cheering on our team. They were such a hit that they've become our standard game day tradition, with everyone hovering around the oven as they bake.
Ingredients
- Ground beef: delivers rich meaty flavor and protein try using 85/15 for best flavor without excess grease
- Taco seasoning packet: provides authentic Mexican flavor without measuring multiple spices
- Pillsbury Pizza Dough: creates a perfectly crisp yet chewy exterior that's foolproof
- Cheese sticks: ensure a perfect melty cheese pull with every bite use the combo of colby and cheddar for best flavor
- Butter, garlic powder, and dried parsley: create an aromatic garlicky crust that elevates these beyond basic
Step-by-Step Instructions
- Preheat the Oven:
- Set your oven to 400°F and line a baking sheet with parchment paper. The parchment prevents sticking and makes cleanup effortless. Make sure your oven is fully preheated before baking for even cooking throughout.
- Cook the Beef:
- Brown the ground beef in a skillet over medium heat for about 5 to 7 minutes until no pink remains. Break it into small crumbles as it cooks for better distribution in the taco sticks. Drain excess fat thoroughly to prevent soggy dough. Add the taco seasoning according to package directions, typically with a small amount of water, and simmer until the mixture thickens slightly.
- Prepare the Dough:
- Roll out the pizza dough on a lightly floured surface into an even rectangle. Use a sharp knife or pizza cutter to divide the dough into 10 equal rectangles. Work quickly as the dough becomes harder to handle as it warms up.
- Assemble the Taco Sticks:
- Place about two tablespoons of seasoned beef on each rectangle, keeping it centered but leaving about half an inch border around the edges. Position a halved cheese stick on top of the meat. Carefully fold the long sides of the dough over the filling, then pinch all edges firmly to create a tight seal. Place each stick seam side down on your prepared baking sheet, spacing them about an inch apart.
- Brush with Garlic Butter:
- Mix melted butter with garlic powder and dried parsley until well combined. Using a pastry brush, generously coat the top and sides of each taco stick with this aromatic mixture. This step creates a golden, flavorful crust and adds moisture to the dough as it bakes.
- Bake to Perfection:
- Bake in your preheated oven for 12 to 15 minutes, watching carefully after the 10 minute mark. The taco sticks should be golden brown on top and fully cooked through. If your oven has hot spots, rotate the pan halfway through baking for even browning.
- Serve and Enjoy:
- Allow the taco sticks to cool for 3 to 5 minutes before serving. This brief rest helps the melted cheese set slightly so it does not burn your mouth. Arrange on a serving platter with small bowls of salsa, sour cream, and guacamole for dipping.
 Save
Save
The taco seasoning is truly the hero ingredient here. When I first developed this recipe, I tried making my own spice blend, but my family unanimously agreed that the classic packet seasoning created that nostalgic taco flavor they craved. Sometimes convenience wins over homemade!
Make Ahead Instructions
These taco sticks shine as a make ahead meal solution. You can prepare them completely up to the baking step, cover tightly with plastic wrap, and refrigerate for up to 24 hours. When ready to serve, simply brush with the garlic butter mixture and add an extra 2 to 3 minutes to the baking time since they'll be cold from the refrigerator. I often prep these in the morning before a busy day so dinner is ready to pop in the oven.
Creative Variations
The basic recipe serves as a perfect canvas for customization. Try substituting ground turkey or chicken for a lighter option, or use plant based crumbles for a vegetarian version. Add a layer of refried beans beneath the meat for extra creaminess and protein. Experiment with different cheese varieties like pepper jack for heat or a Mexican cheese blend for authenticity. My personal favorite variation includes mixing a few tablespoons of mild green chiles into the meat mixture for a subtle flavor boost without adding significant heat.
 Save
Save
Serving Suggestions
Transform these taco sticks into a complete meal by serving alongside complementary sides. A simple tomato and avocado salad dressed with lime juice makes a refreshing contrast to the rich, cheesy sticks. For a heartier meal, serve with Spanish rice or a quick corn and black bean salad. When entertaining, create a dipping station with various salsas ranging from mild to hot, guacamole, sour cream, and even queso dip. This interactive element makes these taco sticks perfect for casual gatherings.
Storage and Reheating
Leftover taco sticks can be stored in an airtight container in the refrigerator for up to 3 days. For best results when reheating, avoid the microwave which can make the dough soggy. Instead, place them on a baking sheet in a 350°F oven for 5 to 7 minutes until heated through. If you want to freeze them, do so before baking. Arrange assembled sticks on a baking sheet, freeze until solid, then transfer to a freezer bag for up to 1 month. Bake frozen sticks at 400°F for 17 to 20 minutes until golden and heated through.
Common Recipe Questions
- → Can I make these Cheesy Taco Sticks ahead of time?
Yes! You can prepare the taco sticks completely, then refrigerate them unbaked for up to 24 hours. When ready to serve, brush with the garlic butter mixture and bake as directed, adding 2-3 minutes to the baking time. Alternatively, you can freeze the assembled but unbaked sticks for up to 1 month, then bake from frozen at 375°F for about 20-25 minutes.
- → What can I serve with Cheesy Taco Sticks?
Cheesy Taco Sticks pair wonderfully with dipping options like salsa, guacamole, sour cream, or queso. For a complete meal, serve alongside a fresh salad, Mexican rice, or refried beans. They're versatile enough for game day snacking, appetizers, or even a fun weeknight dinner.
- → Can I use ground turkey instead of beef?
Absolutely! Ground turkey makes a great substitute for beef in this recipe. You may want to add 1-2 teaspoons of olive oil when cooking the turkey since it contains less fat than beef. The taco seasoning will ensure it's still full of flavor, and the end result will be slightly lighter in calories.
- → How do I prevent the cheese from leaking out during baking?
To prevent cheese leakage, make sure to completely seal all edges of the dough by pinching firmly. Place the taco sticks seam-side down on the baking sheet. You can also try chilling the assembled sticks in the refrigerator for 15-20 minutes before baking, which helps the dough firm up and maintain its seal.
- → Can I make these vegetarian?
Yes! For a vegetarian version, substitute the ground beef with plant-based ground meat alternative, black beans (mashed slightly), or a mixture of sautéed vegetables like bell peppers, onions, and corn seasoned with the same taco seasoning. The cheese can be kept for a vegetarian version or replaced with dairy-free cheese for a completely vegan option.
- → How do I store and reheat leftovers?
Store cooled leftover taco sticks in an airtight container in the refrigerator for up to 3 days. To reheat, place them in a 350°F oven for 5-7 minutes until heated through and crispy again. You can also use an air fryer at 350°F for 3-4 minutes. Microwave reheating works in a pinch (30-45 seconds) but the dough won't be as crispy.